Get Started with Testdino
This guide will walk you through setting up Testdino, from creating your project to integrating with your CI/CD pipeline and analyzing test runs.
Let's get started with the basic setup, and later we'll dive into advanced features.
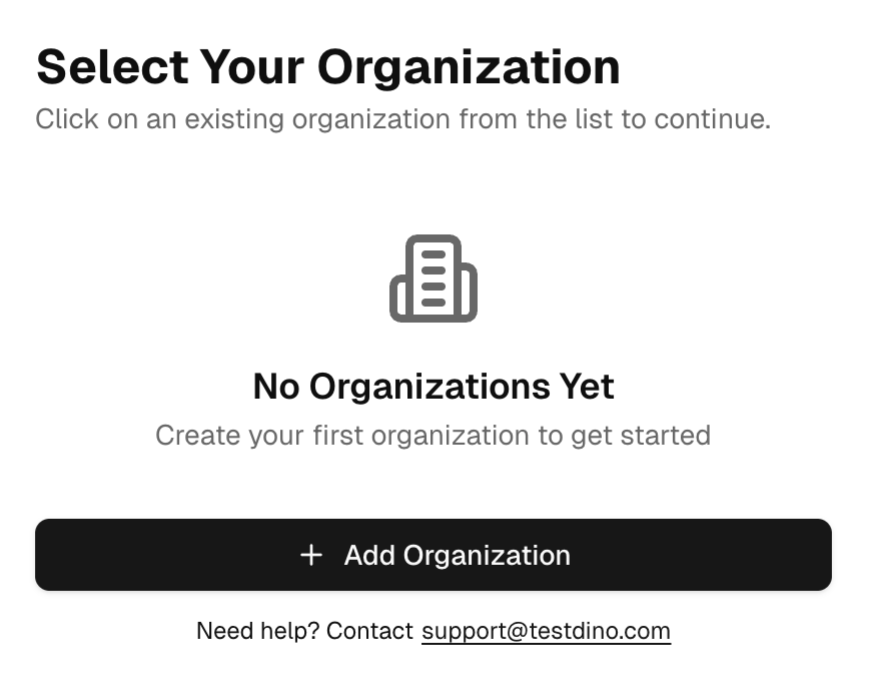
Create an Organization
At first, you'll create an organization. Organizations are used to group your projects and manage team access. Enter an organization name, and you're good to go.
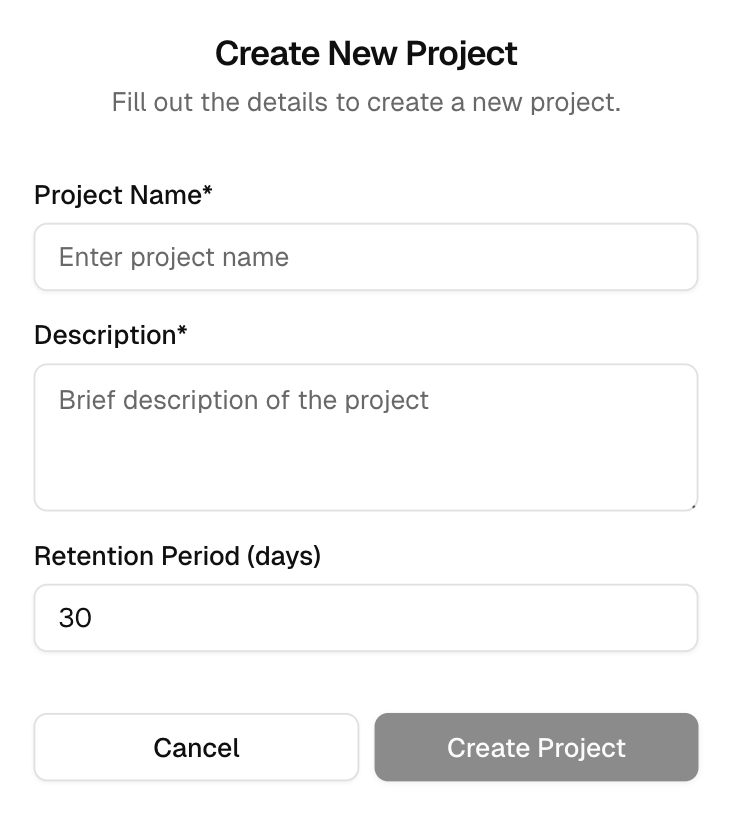
Create a Project
After creating your organization, it's time to create a project. Projects represent the repositories or applications you want to track with Testdino.
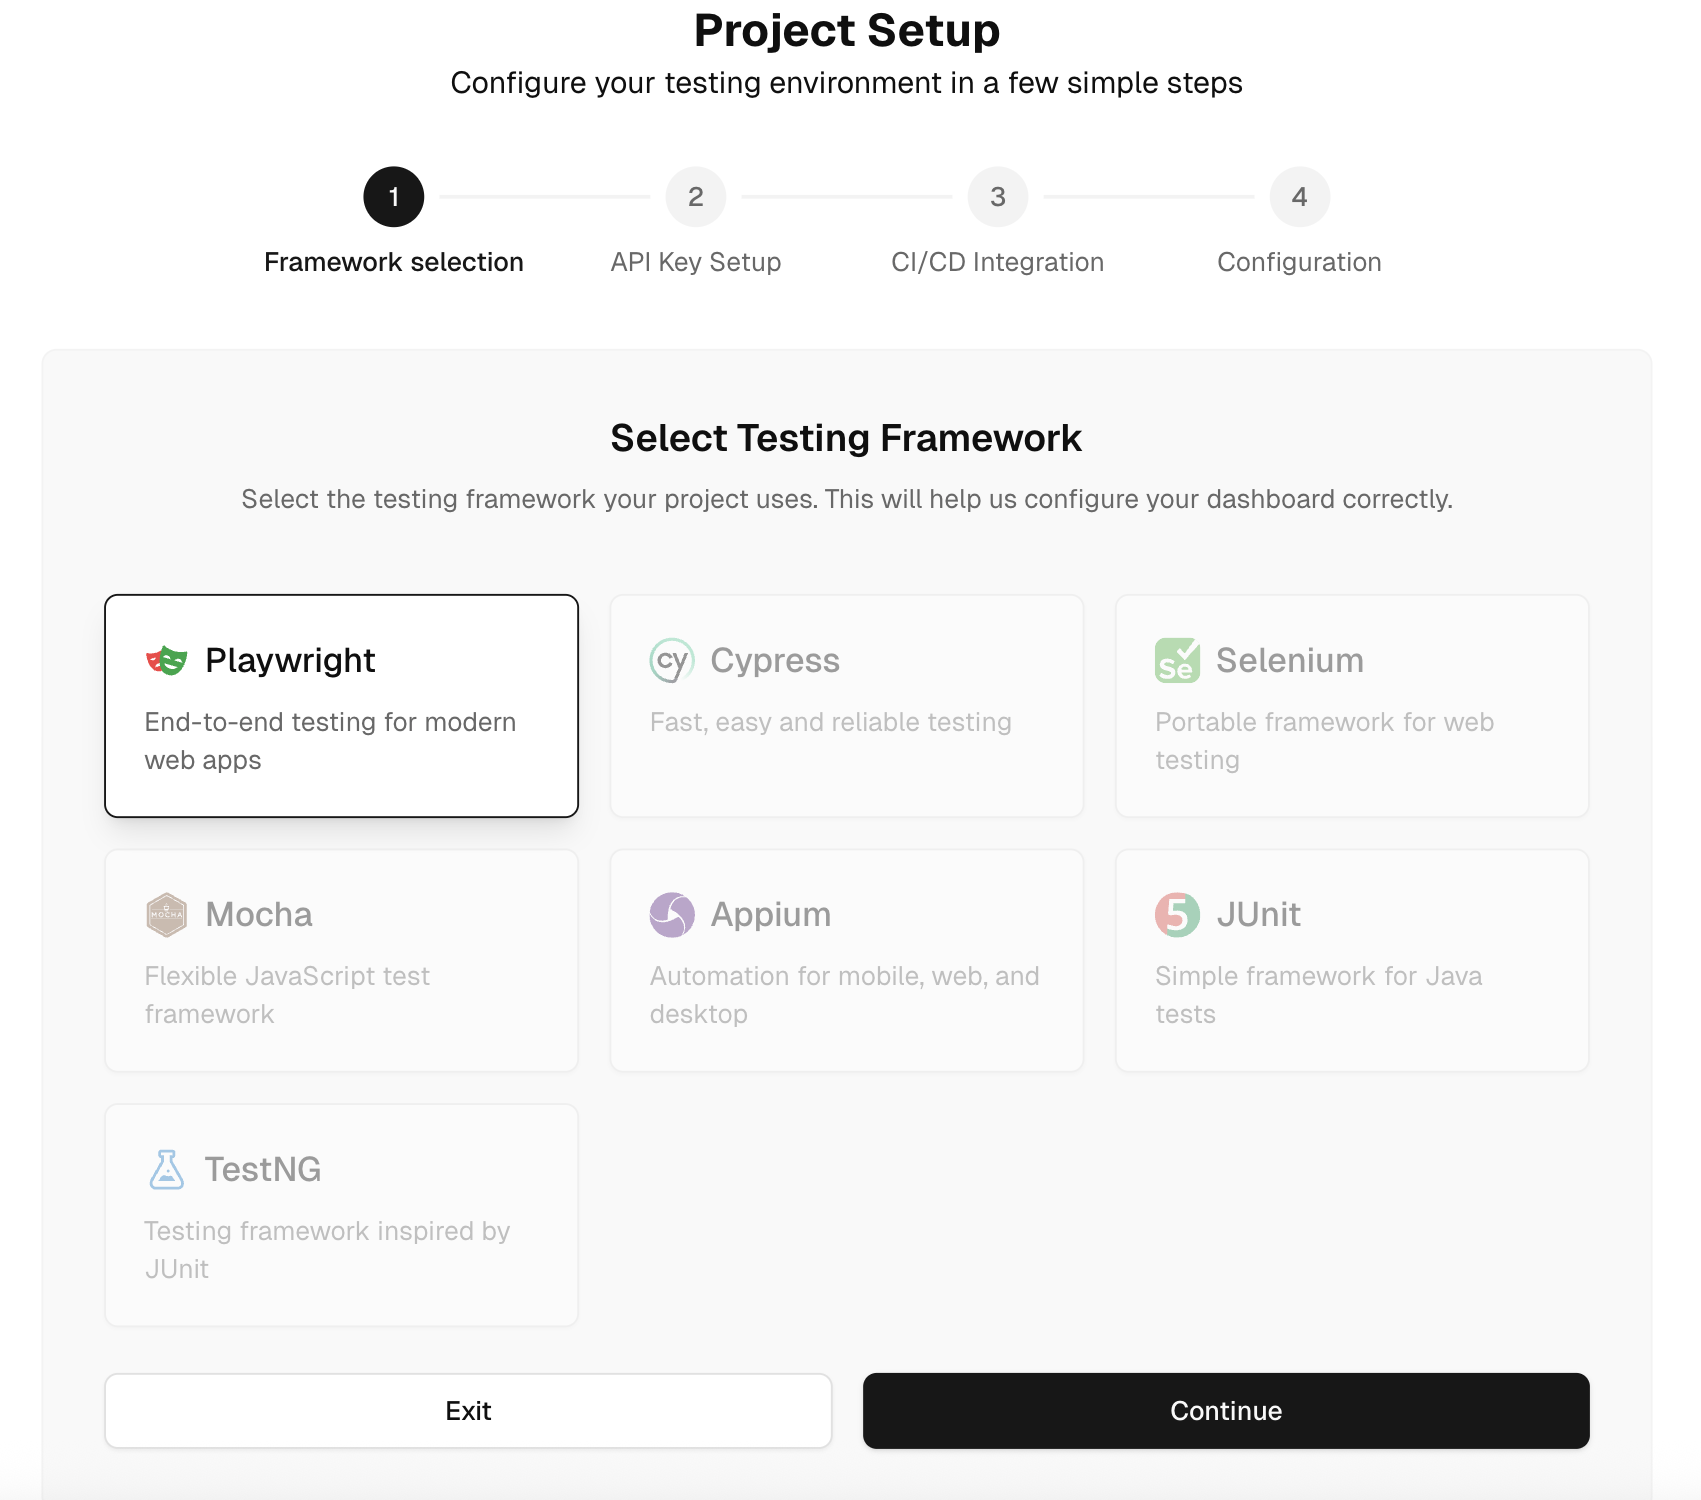
Select Playwright as Your Testing Framework
When creating a project, you will be asked to select a testing framework. Currently, Testdino only supports Playwright as the testing framework.
- Testdino will parse your Playwright HTML/JSON reports and categorize the failures.
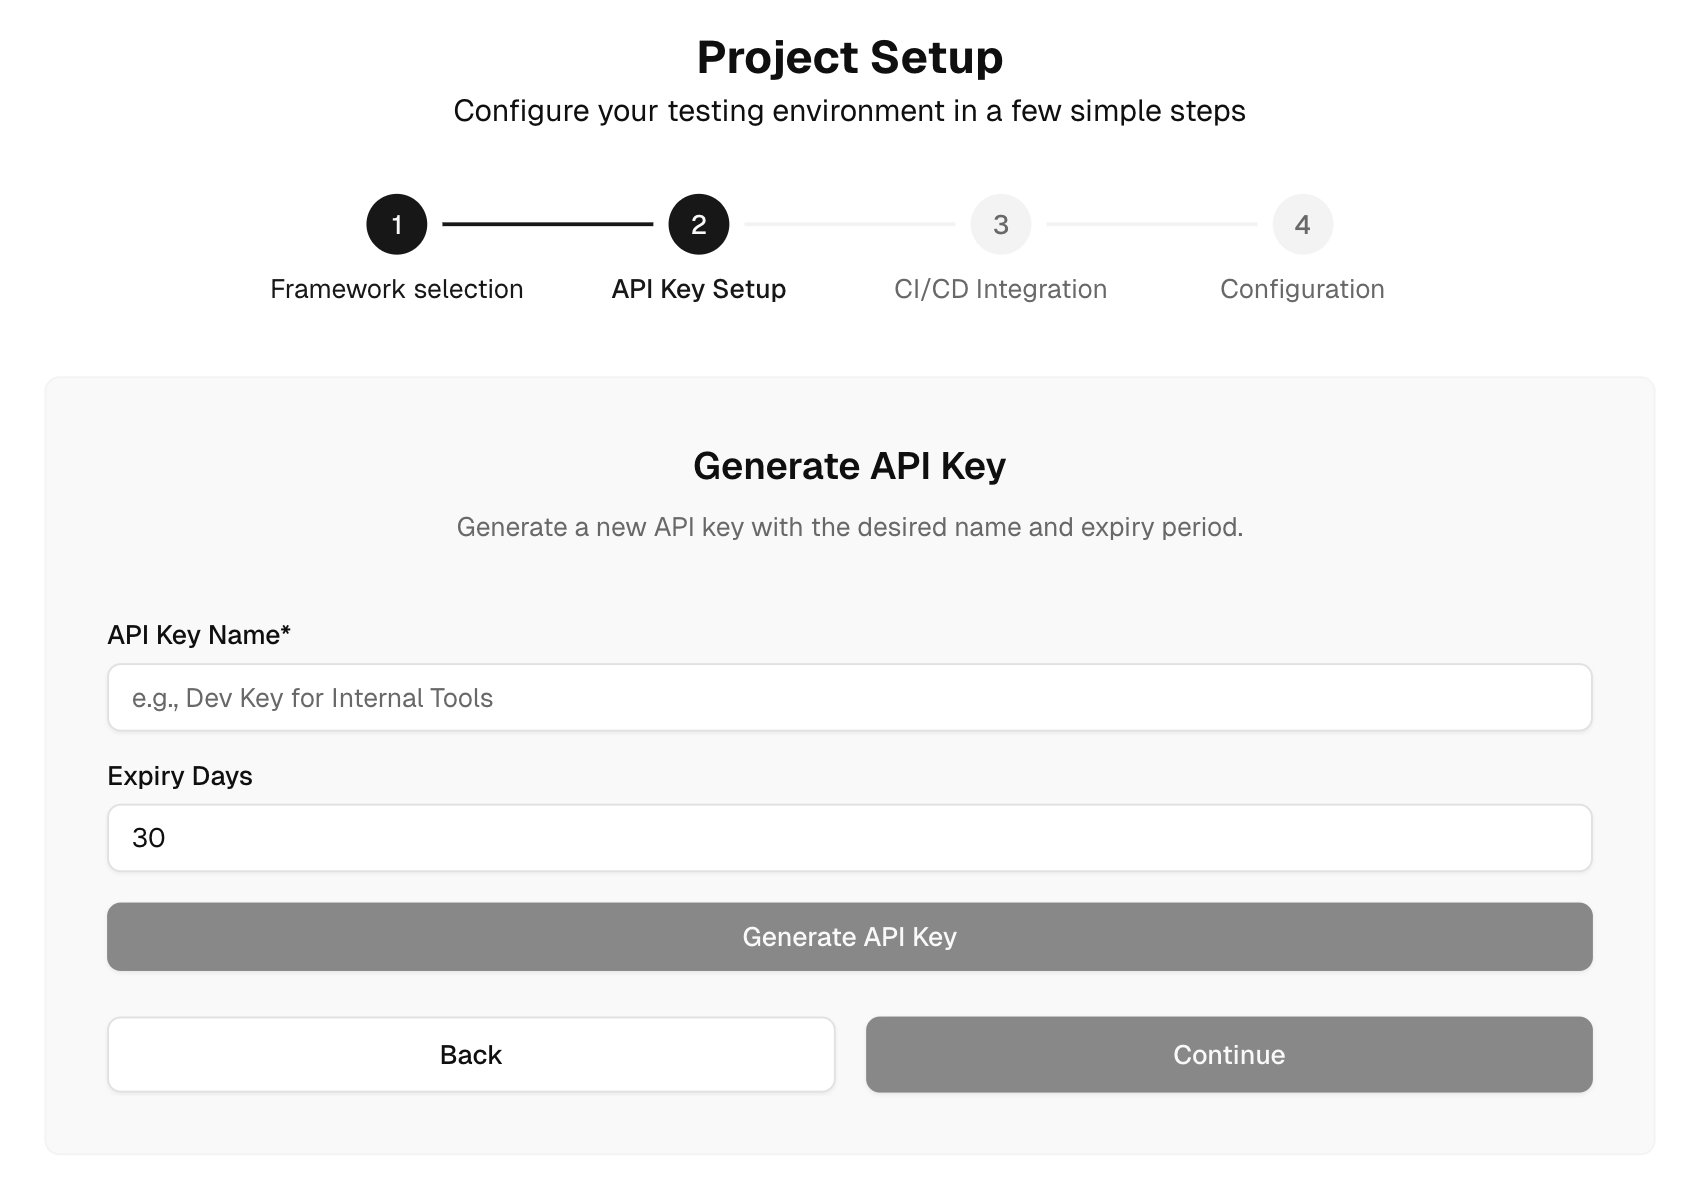
Generate API Key
To authenticate Testdino with your CI/CD pipeline, you need an API Key.
- Click Generate API Key, set an expiration perio from 30 days to 365 days and copy the token.
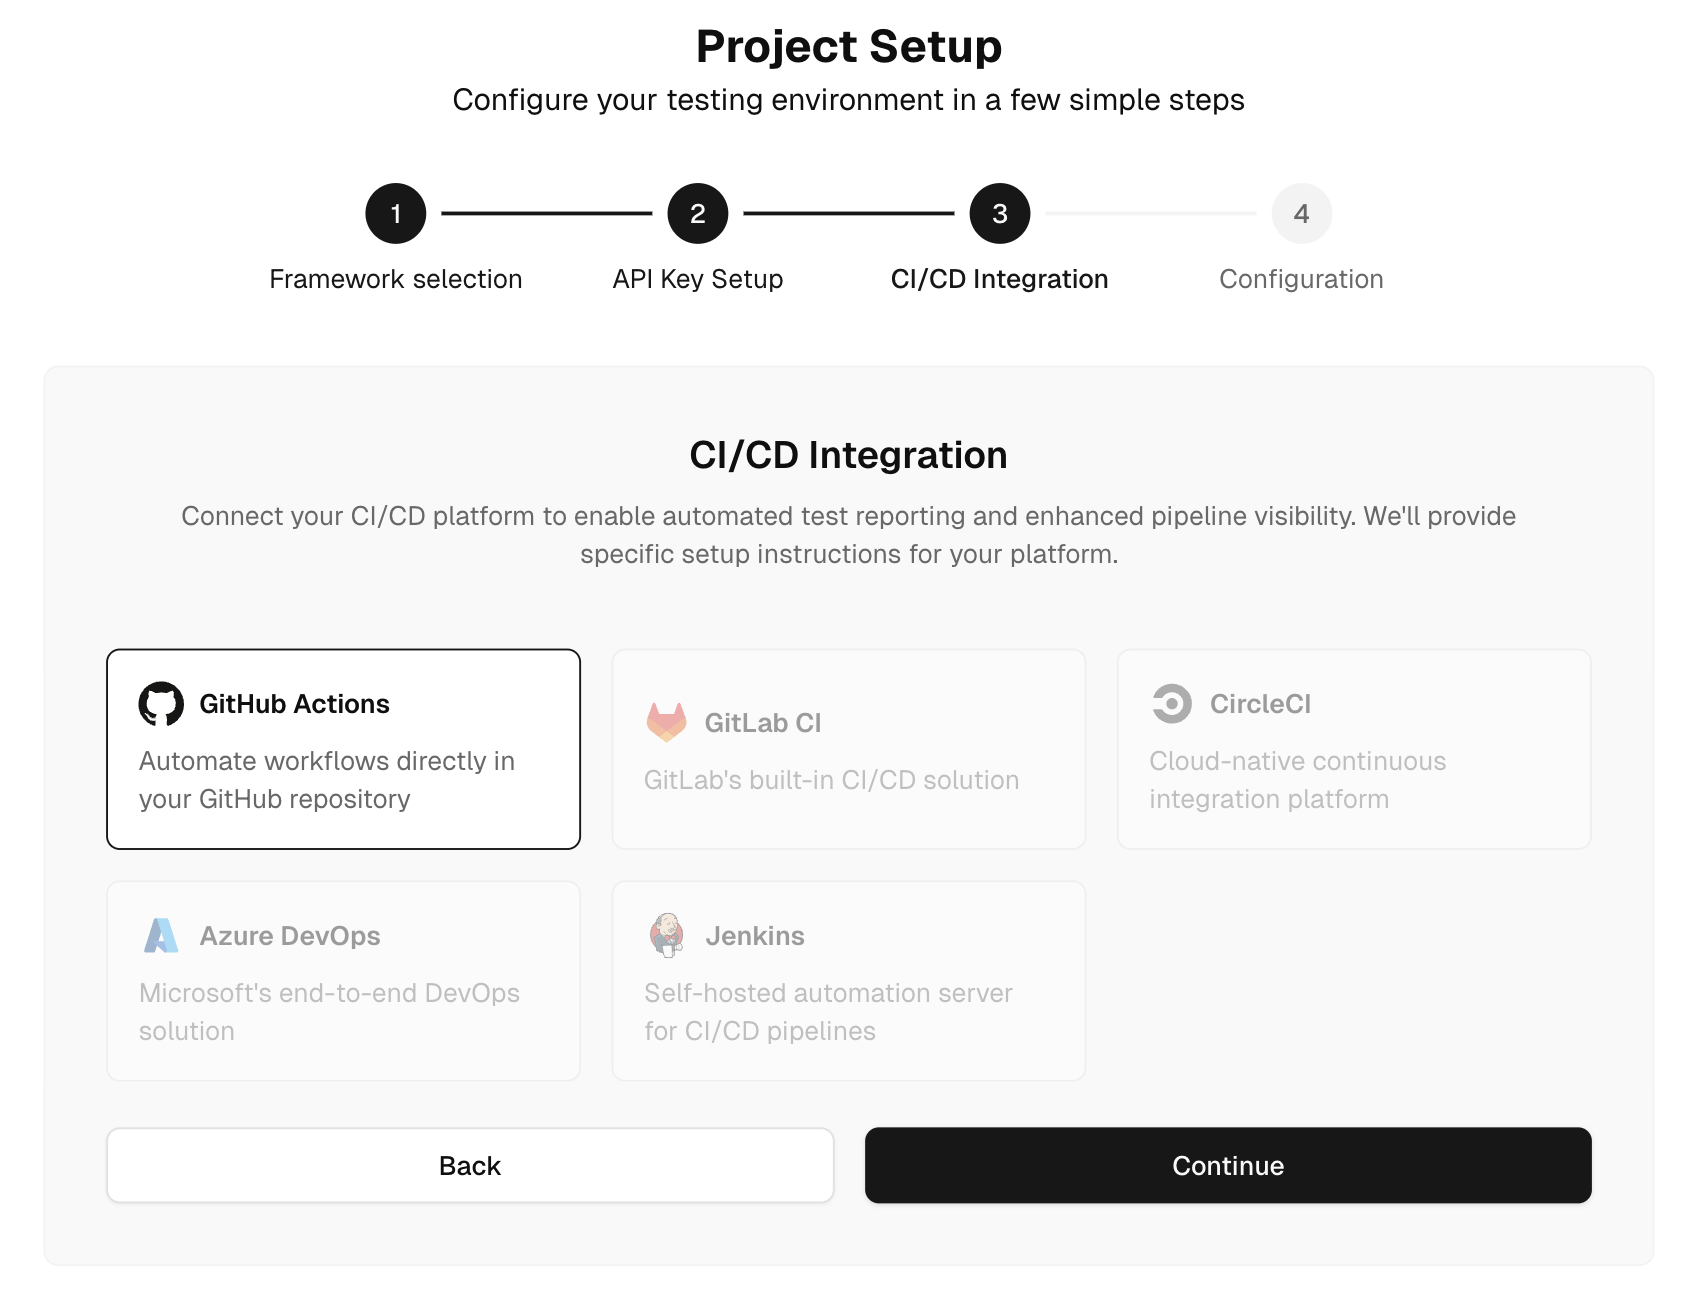
Integrate with CI/CD
Now, integrate Testdino with your CI/CD pipeline to start uploading Playwright reports.
- If you are using GitHub Actions, Testdino provides a YAML snippet to add to your pipeline.
- Save the API key as a repository secret and reference it in your CI configuration file. When your tests run, the Playwright report will be uploaded to Testdino automatically.
Configure Playwright Reporter
To ensure that Testdino correctly processes your test results, configure the Playwright reporter to output HTML or JSON.
To upload a report from your local machine, you can use the below commands.
npx playwright test --reporter=json
npx tdpw path/to/json/report/directory --token <your_api_key>
For GitHub Actions, use the YAML snippet provided earlier to ensure the report is uploaded after each test run.
- name: Testdino Reporter
  run:
    npx --yes tdpw path/to/json/report/directory --token="<your_api_key>" --upload-html
Managing Projects and Organizations
After setting up your first project, you can create additional projects within the same organization.
- Each project has its own settings and can have a different CI/CD configuration.
- To switch between organizations or manage projects, use the organization selector in the Testdino dashboard.
In the Projects tab, scan plan badges and the usage meter on each project card to spot limits at a glance.