Jira
Jira is an issue tracker used by many teams to plan, assign, and resolve work. It matters in testing because it is where failures become tracked tasks with owners and due dates.

How does Jira work with Testdino?

-
Connect your Jira account, then set a Default App and Default Project.
-
From a failed or flaky test, choose Raise Bug and a Jira issue opens with details prefilled.
-
Use Sync after you add new projects or fields in Jira so pickers stay up to date.
-
You can disconnect at any time.
Create a Jira Bug Report in Testdino
When you raise an issue from a failed or flaky test, Testdino opens a clean, prefilled form so you don’t have to copy-paste logs or stitch links.
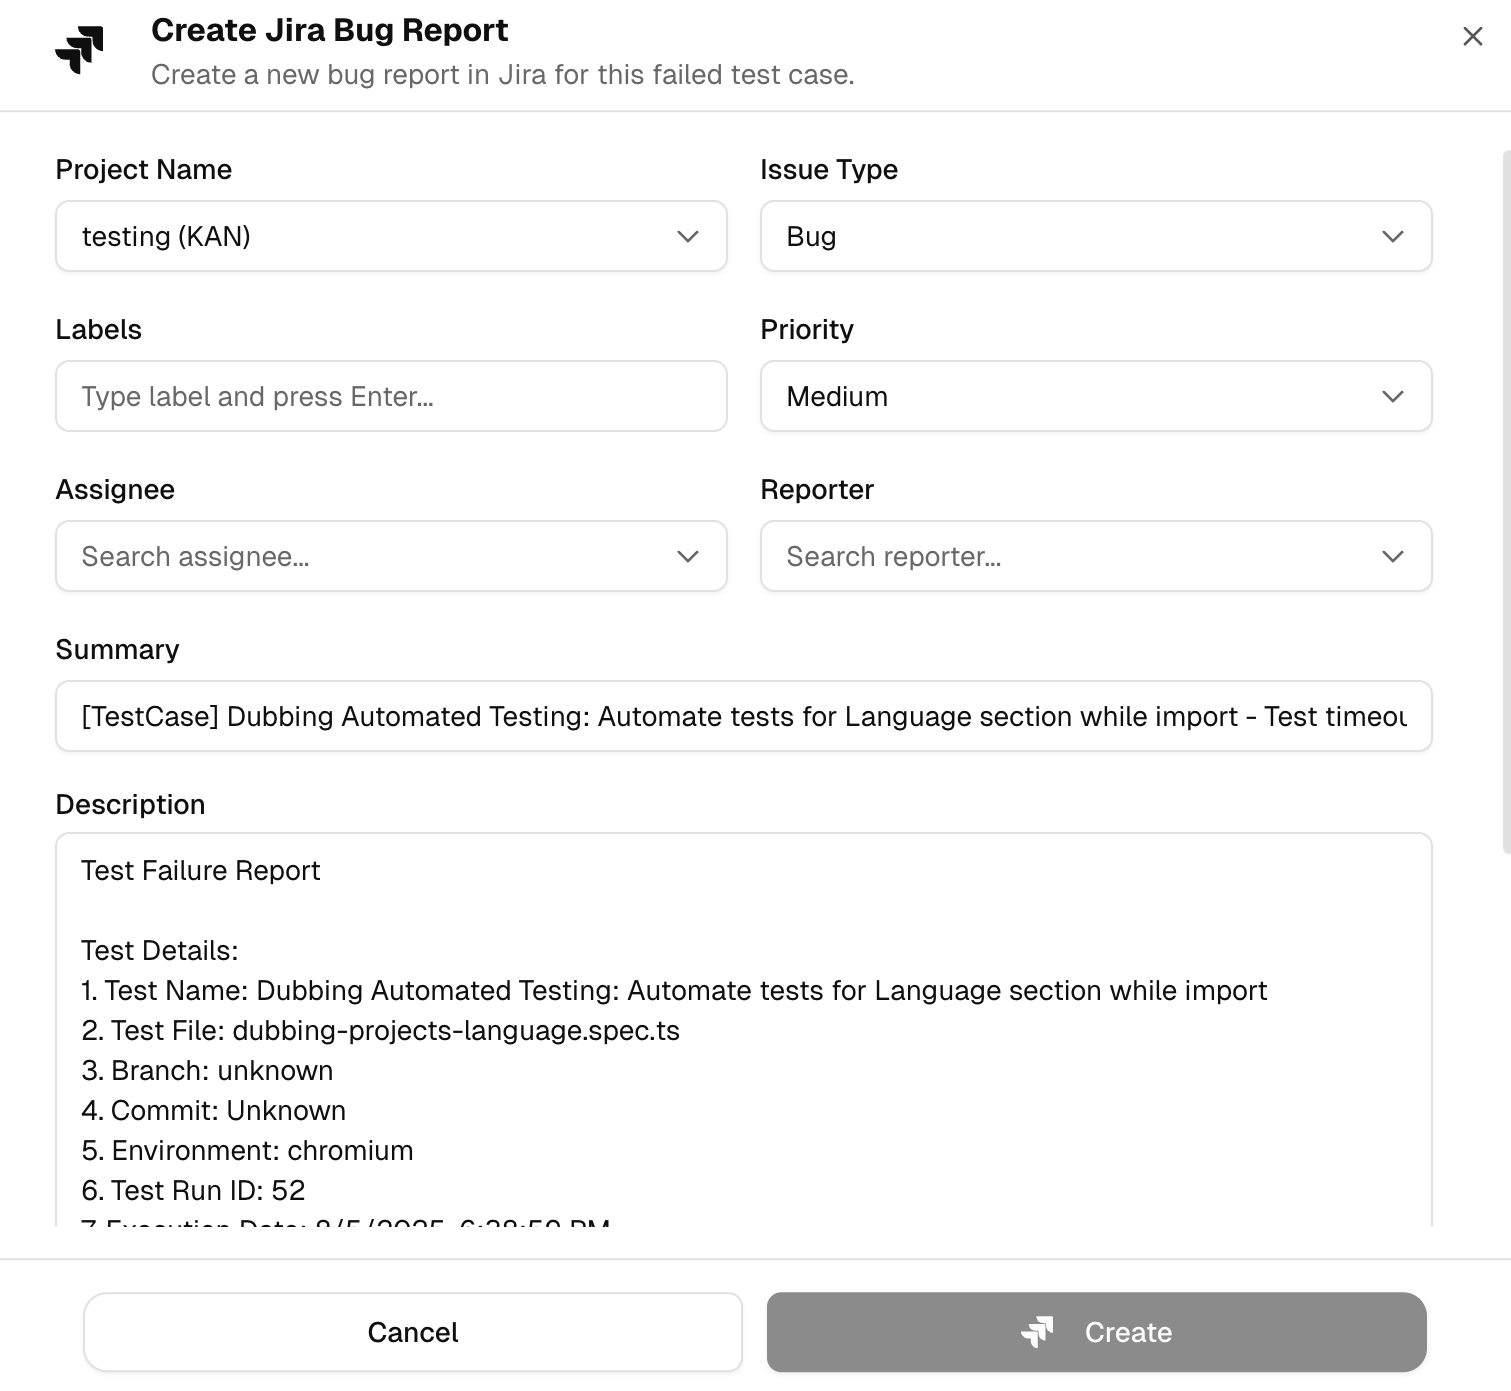
What’s prefilled by Testdino?
-
Project name: Pick the Jira project where the ticket is meant to be added.
-
Issue type: Set Bug, Task, or any type your Jira allows. Teams that triage with different types can keep their flow.
-
Priority: Mark impact up front so triage stays focused.
-
Labels: Add labels your team uses for components or squads. This makes the ticket easy to find later.
-
Assignee, Reporter, Sprint: Route the work to the right owner, keep the original reporter for context, and tie it to the active sprint if you want.
-
Dates and points: Optional fields for start date, due date, and story point estimate if your process needs them.
-
Summary: Testdino pre-fills a clear title, for example:
[TestCase] <name> – <short failure hint>
You can adjust it before creating the ticket. -
Description (prefilled for you): A structured block that ships the full story to Jira:
-
Test Failure Report with a readable intro.
-
Test details: test name, spec file, branch, commit author, commit message, environment, test run ID, execution date, total runtime, and attempts.
-
Failure information: error type and the key error message.
-
Focused steps: the attempt where it failed, with the code frame around the failing line.
-
Links: direct links to the Testdino test run page, the Git commit, and the CI/CD run.
-
Screenshots: thumbnails are listed; you can also Upload Screenshots before creating the issue.
-
A small note that the issue was generated from an automated test failure.
-
This layout gives a developer everything needed to reproduce or fix the bug without hunting through CI logs.
After you create the issue
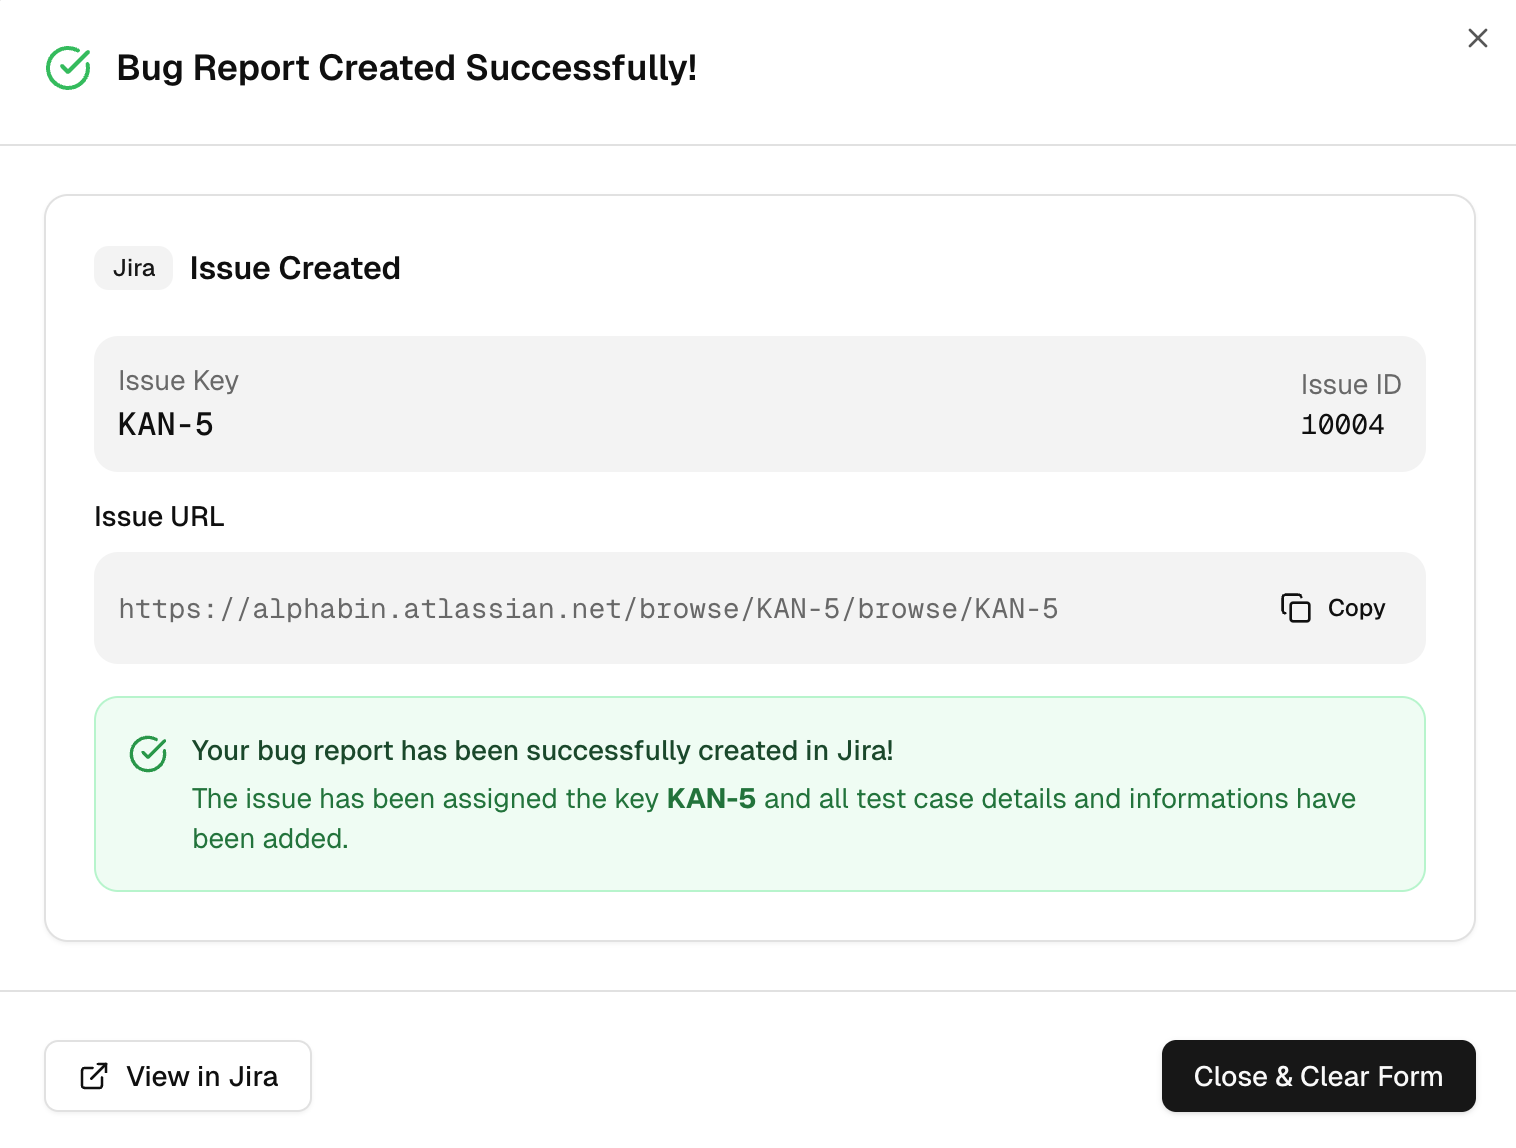
You’ll see a confirmation card in Testdino that includes:
-
Issue key and Issue ID from Jira.
-
Issue URL with a one-click Copy control.
-
A success message confirming the ticket was created and that all test case details were added.
-
Click the provided shortcut, and you will be redirected to Jira.
If your Jira projects or fields look out of date, use Sync on the Integrations page to refresh the connection.
Why does this help?
-
You file a complete bug in seconds.
-
Triage starts with context, not a blank description.
-
Developers jump straight to proof and can reproduce faster.
- All Jira settings are per project in Testdino.
- Screenshots or extra steps can be added in the Jira composer before you create.