> ## Documentation Index
> Fetch the complete documentation index at: https://docs.testdino.com/llms.txt
> Use this file to discover all available pages before exploring further.
# TestDino Project Settings
> Manage API keys, integrations, reports, AI features, and environment mapping.
export const VideoSchema = ({name, description, thumbnailUrl, uploadDate, duration, contentUrl, embedUrl}) => {
const schema = {
"@context": "https://schema.org",
"@type": "VideoObject",
name,
description,
thumbnailUrl,
uploadDate,
...duration ? {
duration
} : {},
...contentUrl ? {
contentUrl
} : {},
...embedUrl ? {
embedUrl
} : {},
publisher: {
"@type": "Organization",
name: "TestDino",
logo: {
"@type": "ImageObject",
url: "https://docs.testdino.com/logo/light.svg"
}
}
};
return ;
};
**What you'll learn**
* How to manage project identity and API keys
* How to configure automated reports, AI features, and status badges
* How to connect integrations and map branches to environments
Update project metadata, track monthly execution quota, issue and rotate API keys, connect [Integrations](/integrations/overview), and map branches to environments.
## General
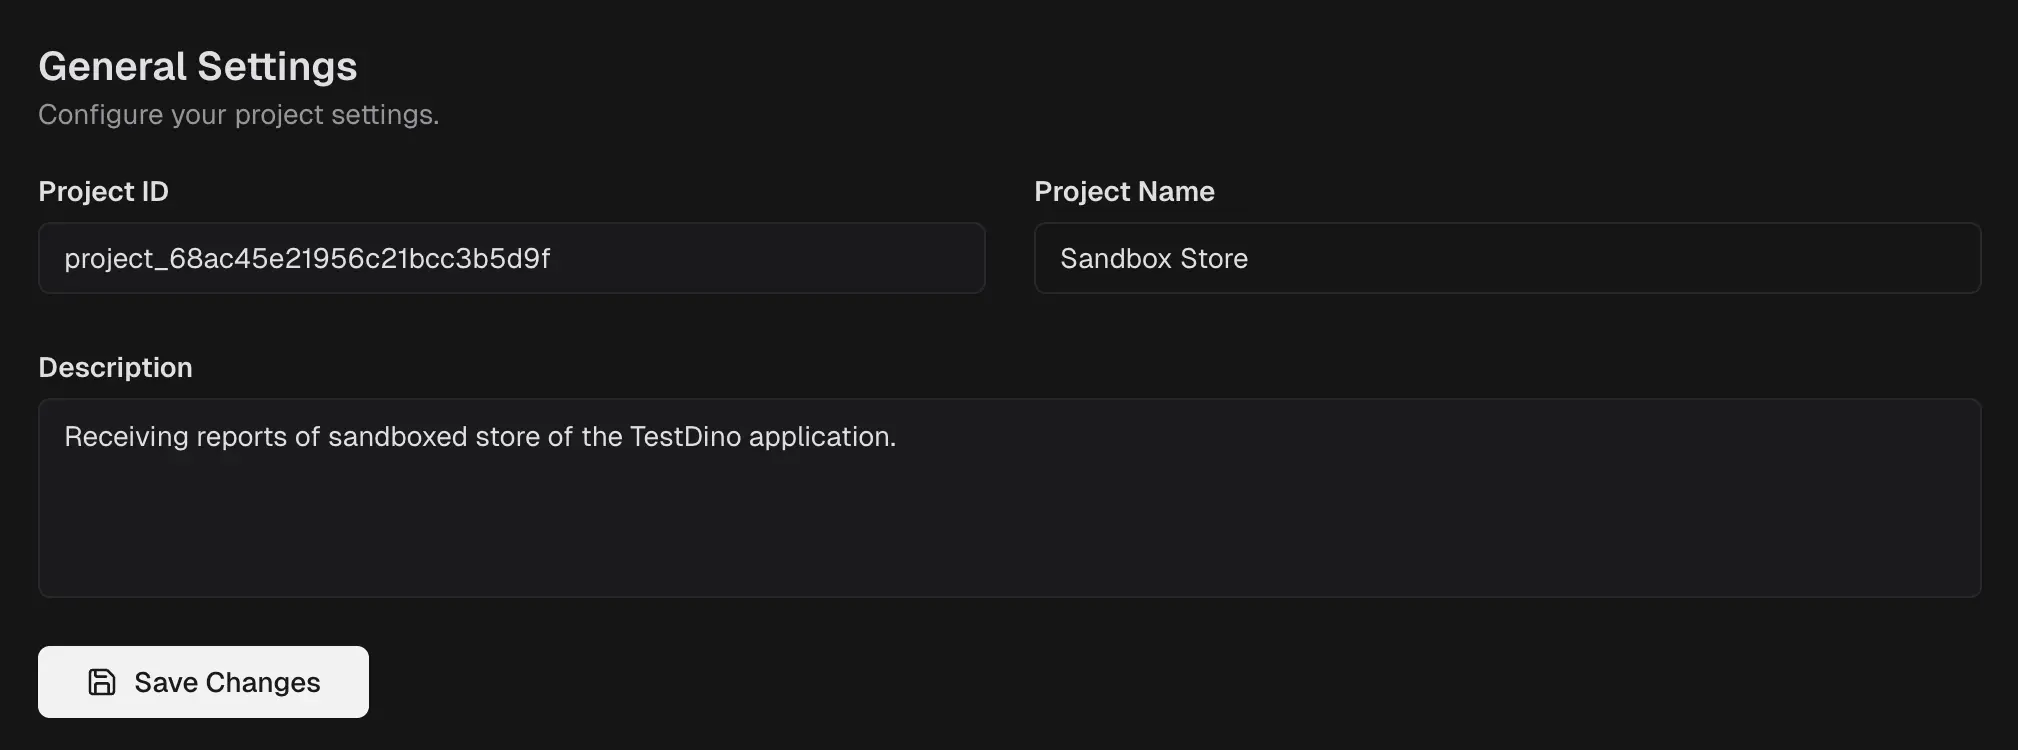
Define the project identity and context shown across the product.
* **Project ID.** Read-only identifier used by our platform or support.
* **Project Name.** Display name in headers and menus.
* **Description.** Short note to describe scope or ownership.
* **Danger Zone.** Permanently delete this project and all of its data. This action cannot be undone. Click **Delete Project** to proceed.
**Warning**
Before deleting, revoke API keys, disconnect webhooks, and export any required reports.
## API Keys
Create and manage credentials for local or CI pipelines and tools that send data to TestDino.
### Create a key
1. Select **Generate Key**.
2. Enter a **Key Name** and **Expiration (days)**, 1 to 365.
3. Create the key and store the secret in your secret manager.
### Manage keys
* **Copy or view details.** Use row actions to retrieve metadata as allowed.
* **Rotate.** Create a replacement key, update CI, then revoke the old key.
* **Revoke or delete.** Immediately invalidates the key.
**Tip**
Prefer short expirations for CI. Rotate if exposure is suspected.
For full instructions on generating, scoping, rotating, and revoking keys, see the [Generate API Keys guide](/guides/generate-api-keys).
## Automated Reports
Automated Reports generate PDF summaries of test execution data and send them to specified recipients on a recurring schedule.
### Create a report
1. Click **Create Automated Report**.
2. Enter a **Report Name**.
3. Add recipients, configure the schedule, and apply optional filters.
4. Select **Create**.
Use the **Enable/Disable** toggle to control whether the report generates on schedule.
### Recipients
Add one or more email addresses. Each recipient has a type selector for **To**, **CC**, or **BCC**.
### Schedule
| Setting | Options |
| :----------------- | :--------------------------------------------------- |
| Frequency | Daily, Weekly, or Monthly |
| Time (UTC) | 00:00 to 23:00 (local timezone shown in parentheses) |
| Day of Week | Sunday to Saturday (Weekly frequency only) |
| Report Time Period | Lookback window of 1 to 30 days |
### Filters
Filters are optional. Narrow report data by tags or environment.
| Filter | Description |
| :---------- | :--------------------------------------- |
| Tags | Add one or more tags to scope the report |
| Environment | Select from branch environment mappings |
### Report actions
| Action | Description |
| :----------- | :---------------------------------------------------- |
| Preview | Download a sample PDF before sending |
| Edit | Update recipients, schedule, filters, and time period |
| Pause/Resume | Temporarily disable or re-enable a report |
| Delete | Remove a report configuration |
For step-by-step setup and report content details, see the [Automated Reports Guide](/guides/automated-playwright-reports).
## AI Features
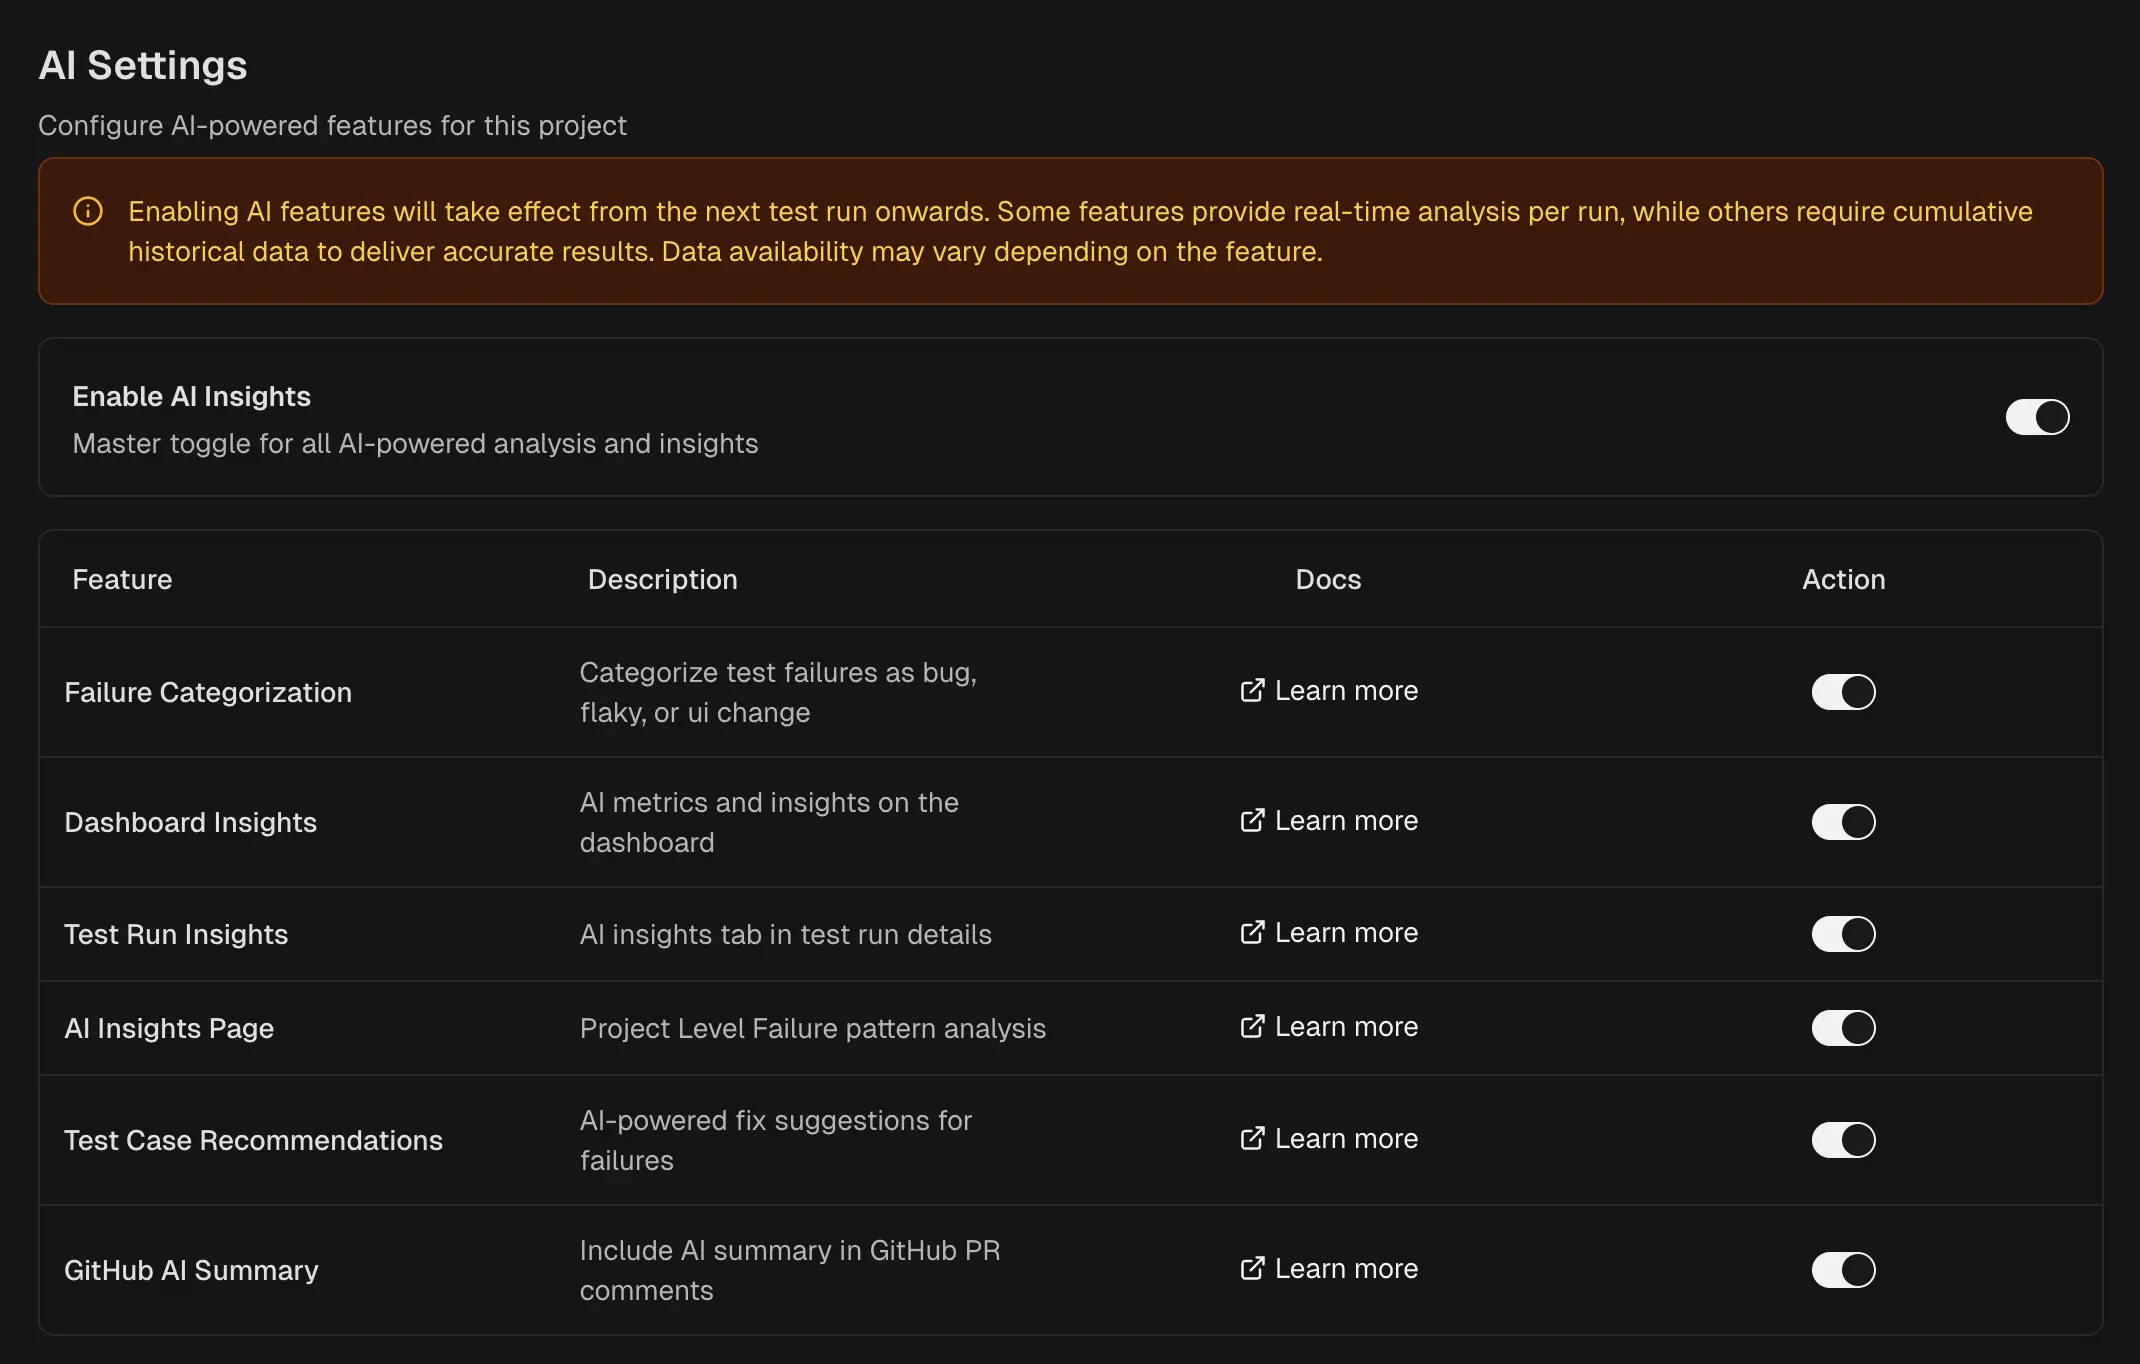
Control which AI-powered features are active for this project. All AI features are enabled by default for new and existing projects.
### Master toggle
The **Enable AI Insights** toggle controls all AI features at once. Disable it to turn off every AI feature for the project. Enable it to restore individual feature settings.
### Individual feature toggles
When the master toggle is enabled, configure each AI feature independently:
| Feature | What it controls |
| :---------------------------- | :------------------------------------------------------------------------ |
| **AI Failure Classification** | Categorizes failures as Actual Bug, UI Change, Unstable, or Miscellaneous |
| **AI Failure Patterns** | Detects persistent, emerging, and regression patterns across runs |
| **AI Test Case Analysis** | Provides root cause analysis, recommendations, and quick fixes per test |
| **AI Error Grouping** | Groups similar errors by message and stack trace |
### Behavior
| Detail | Value |
| :----------------- | :------------------------------------------------ |
| Default state | All features enabled |
| When changes apply | From the next test run |
| Disabled features | Do not generate AI analysis or insights |
| Existing data | Previous AI insights remain visible for past runs |
| Permissions | Admin and Editor roles only |
**Note**
Disabling an AI feature does not affect other platform functionality. Test execution, reporting, and all non-AI features continue to work normally.
## TestDino Add-ons
### Status badges
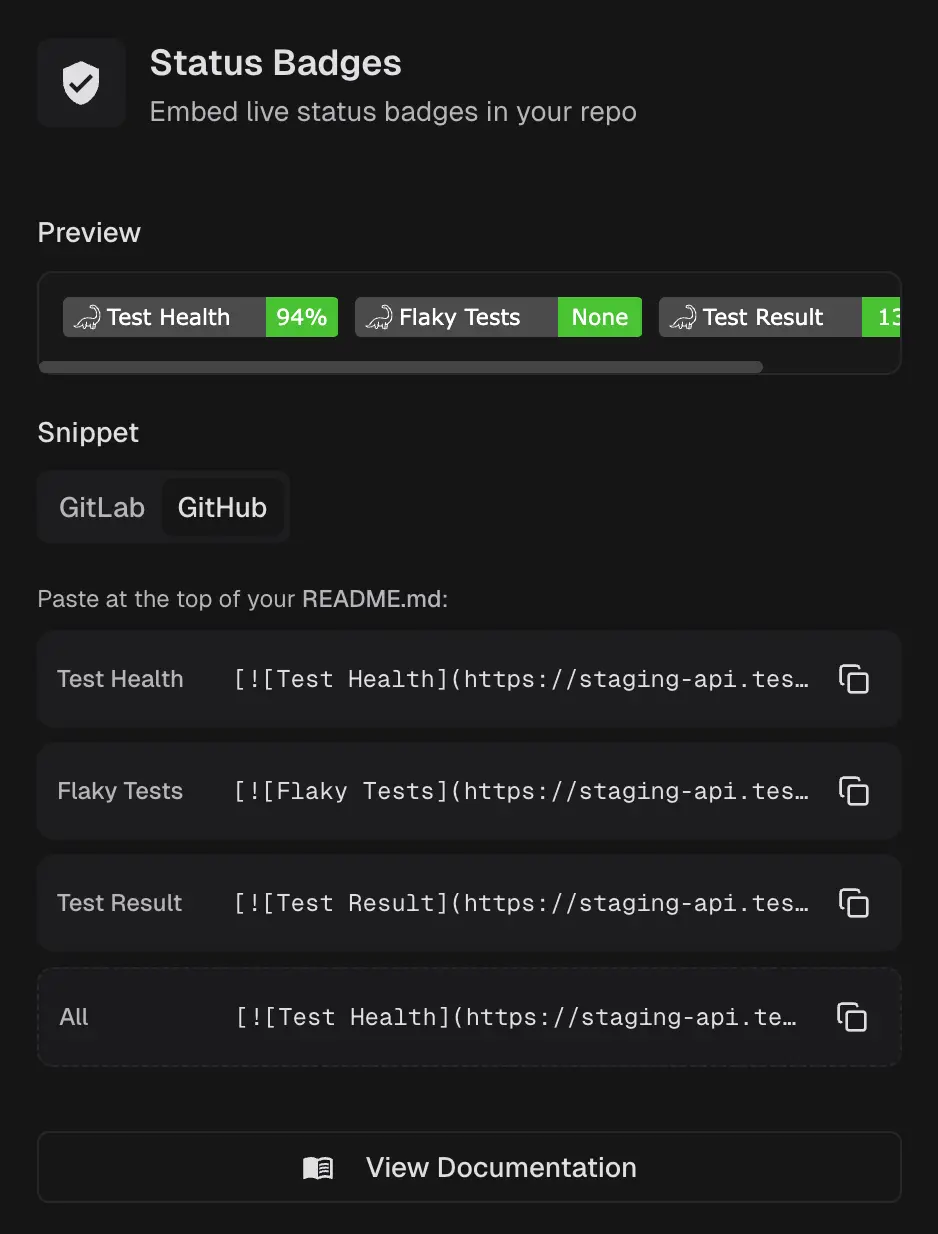
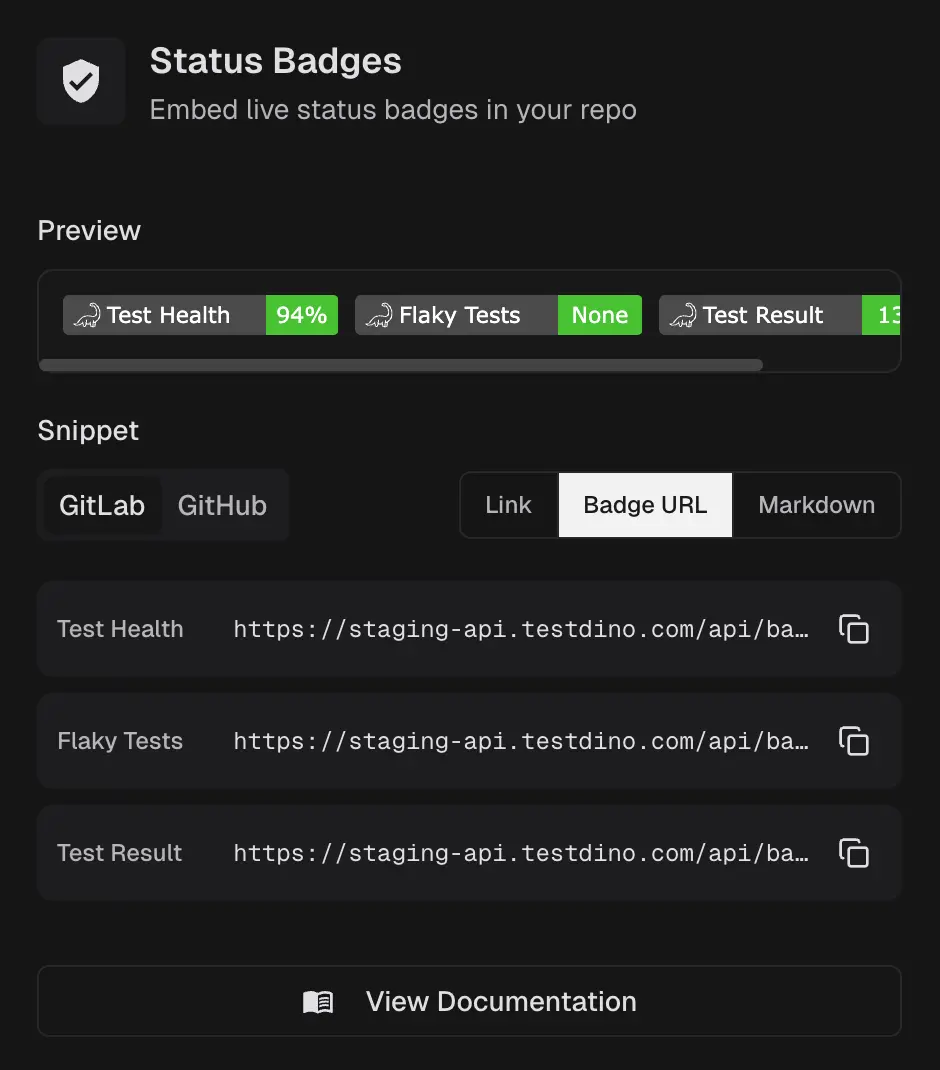
Embed live SVG badges in GitHub or GitLab READMEs that display test health, flakiness, and test counts from the latest completed run. Configure badges from **Integrations → TestDino Add-ons → Status Badges**.
For badge types, color scales, and setup steps, see the [Status Badges guide](/guides/test-health-badges).
## Integrations
A central place to connect CI/CD, communication, and issue tracking. For installation, permissions, and workflows, see [**Integrations**](/integrations/overview).
### 1. CI/CD
**GitHub** - Test-run summaries on commits and PRs.
**GitLab** - Test-run summaries on merge requests and commits. Only one Git provider (GitHub or GitLab) can be active per project.
**TeamCity** - Upload Playwright test reports from your TeamCity builds directly to TestDino.
### 2. Issue Tracking
To create issues from failed or flaky tests, use:
* [Jira](/integrations/jira-playwright-test-failures)
* [Linear](/integrations/issue-tracking/linear)
* [Asana](/integrations/issue-tracking/asana)
* [monday](/integrations/issue-tracking/mon)
### 3. Communication
* **Slack Webhook** - posts a test run summary to the Slack channel.
* **Slack App** - posts a test run summary to the Slack channel mapped to the run’s branch environment.
**Note**
If no environment mapping matches, TestDino posts the summary to the default Slack channel. Map each branch pattern to an environment and select a Slack channel for that environment; environment mapping takes precedence over the default channel. This applies to GitHub as well.
### Typical actions
* Connect the integration using OAuth, then grant the required scopes.
* Configure targets, such as the default project, team, or channel, and map by environment or branch where supported.
* For **GitHub:** Enable bot comments on pull requests and commits, and choose the branches or environments that should receive summaries.
* For **Slack App:** Set a default channel, map environments or branch patterns to channels, refresh the channel list, and send a test message.
## Branch Mapping
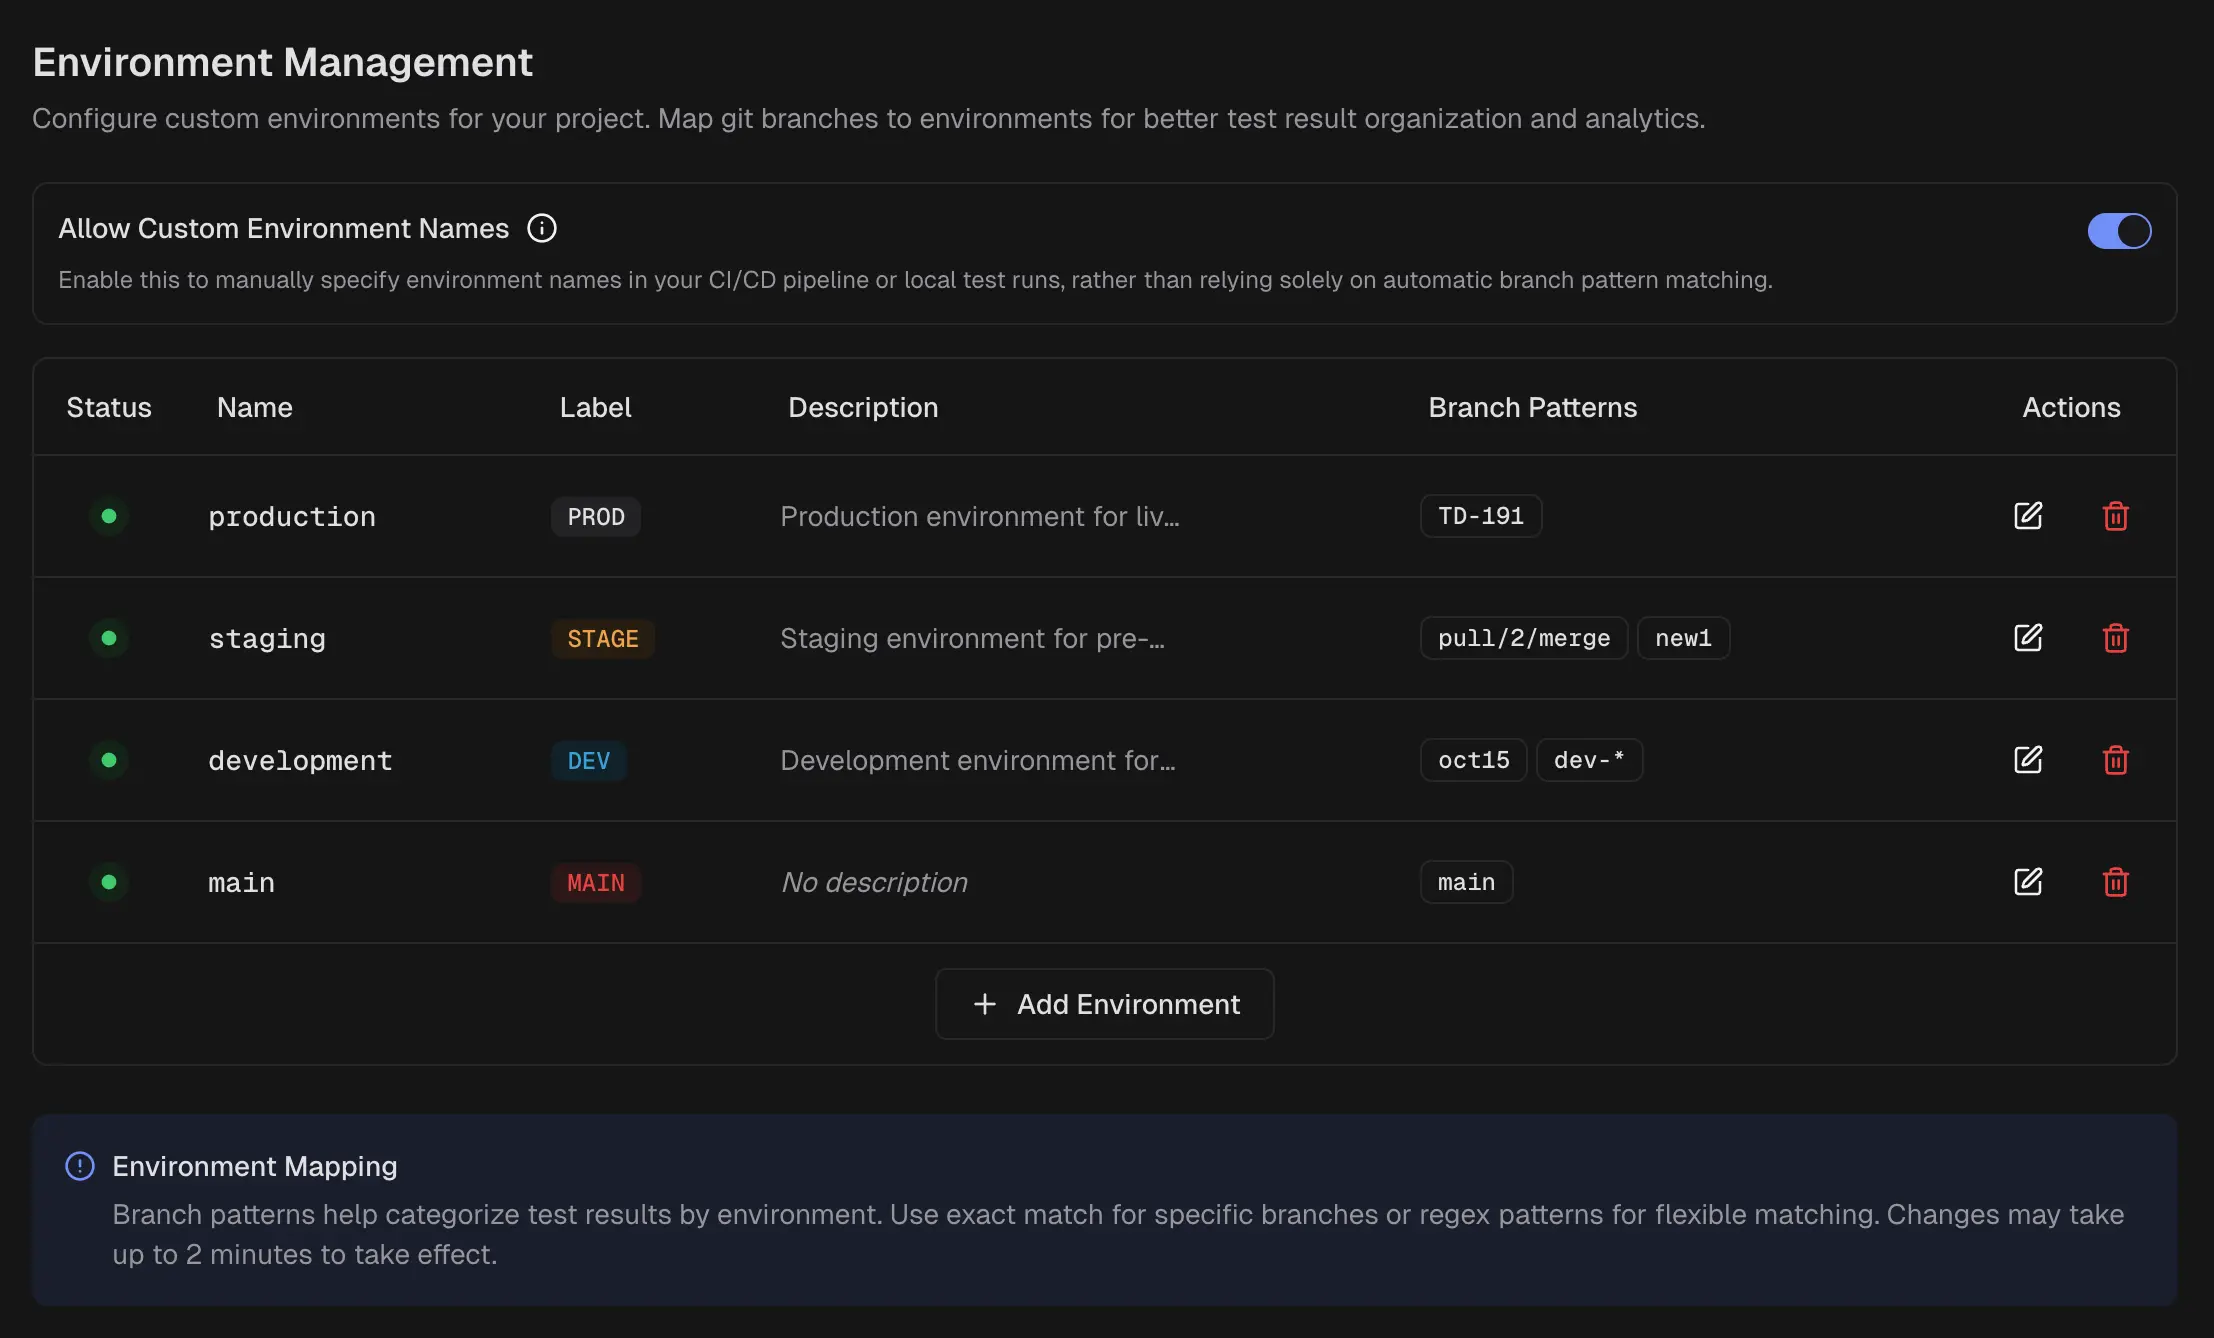
It maps repository branches to specific environments (production, staging, etc.) using exact names or patterns, ensuring your results display in the correct environment throughout the platform.
### Why it matters
End-to-end tests often run on pull requests and short-lived branches. Without mapping, those runs fragment across dozens of branch names.
Mapping rolls them up to the right environment, so pass rates, volumes, and alerts reflect reality.
### Add or edit an environment
1. Enter **Name** and a short **Label** used in chips and filters.
2. Optionally set a **Description** and color.
3. Define **Branch patterns**:
* **Exact match** to bind a single branch, for example, `main`.
* **Pattern match** to bind many branches, for example, `feature/*`, `release/*`, `hotfix/*`.
4. Save. Changes can take up to 2 minutes to apply.
**Warning**
* Environments and branches: A development or staging environment typically encompasses multiple branches, for example, `feature/123` or `user/td-123`. Production typically maps to one protected branch, such as, `main` or `master`. Teams that run tests on PRs opened or merged will execute on the PR’s head branch. Mapping ensures those runs are attributed to the correct environment.
* Keep labels short, for example, PROD, STAGE, DEV.
* Review patterns when you add long-lived branches.
* Limit: up to 10 environments per project.
### CLI environment override
You can bypass branch mapping and assign test runs to a specific environment directly from the CLI.
#### 1. How it works
When enabled, the `--environment` flag in your upload command takes priority over branch mapping rules. If you specify `--environment=staging`, that run goes to staging regardless of which branch triggered it.
This is useful when:
* You run tests against multiple environments (prod, stage) from a single commit
* Your CI pipeline targets specific environments that don't match your branch naming
* You need manual control over the environment assignment for certain runs
#### 2. Enable CLI Environment Override
1. Go to **Project Settings → Environment Settings**
2. Turn on **CLI Environment Override**
3. Click **Save** to apply the changes.
With the toggle off (default), the CLI flag is ignored, and branch mapping rules apply.
#### 3. Using the flag
Add `--environment` to your upload command:
```bash theme={null}
npx tdpw upload ./playwright-report --token="your-token" --environment="staging"
```
**Warning**
* Maximum 10 environments per project. If you've hit the limit, the CLI run still succeeds but uses branch mapping instead. You'll see a warning in the CLI output.
* Environment names must be valid. Invalid characters cause the upload to fail.
### How CLI runs interact with mapping updates
* **CLI-created runs**: When you update branch mapping rules, test runs created via the `--environment` flag keep their original environment. The CLI value is preserved.
* **Branch-mapped runs**: Existing runs created through branch mapping update to reflect the new rules.
## Branch Pinning
Branch pinning keeps the branches you check most often, such as `main` or a release branch, at the top of every Branch filter, so you don't scroll or search to find them. It lives under **Filter Customization**, just below Branch Mapping.
### Why it matters
Active projects accumulate dozens or hundreds of branches. Branch filters list them in raw or alphabetical order, so the few branches that matter get buried. Pinning floats them to the top for everyone on the project, across the Test Runs and Analytics filters.
### Pin branches
1. Go to **Project Settings → Branch Mapping → Filter Customization**.
2. On the **Branch** row, select **Configure**.
3. In the dialog, search for branches and tick the ones to pin. Pinned branches move to the top of the list.
4. Select **Save**. The pinned branches apply across the project immediately.
To unpin, open **Configure** again, clear the branches or use **Clear all**, then save.
### Behavior
| Detail | Value |
| :----------------- | :---------------------------------------------------------------------------------------------------- |
| Scope | Project-wide. Applies to every member. |
| Where it applies | Every Branch filter (Test Runs and Analytics) |
| Ordering | Pinned branches appear first, regardless of the selected environment; the rest keep their usual order |
| No branches pinned | Filters behave exactly as before |
| Branch source | Actual branch names from your test runs; patterns and regex can't be pinned |
| Limit | Up to 200 pinned branches |
| Permissions | Admins can edit; all members see the effect |
**Note**
Pinned branches stay at the top even when you select a different environment in the filter. If a pinned branch stops appearing in test runs, it stays saved and removable but won't show in filters until it's seen again.
 Define the project identity and context shown across the product.
* **Project ID.** Read-only identifier used by our platform or support.
* **Project Name.** Display name in headers and menus.
* **Description.** Short note to describe scope or ownership.
* **Danger Zone.** Permanently delete this project and all of its data. This action cannot be undone. Click **Delete Project** to proceed.
Define the project identity and context shown across the product.
* **Project ID.** Read-only identifier used by our platform or support.
* **Project Name.** Display name in headers and menus.
* **Description.** Short note to describe scope or ownership.
* **Danger Zone.** Permanently delete this project and all of its data. This action cannot be undone. Click **Delete Project** to proceed.
 Create and manage credentials for local or CI pipelines and tools that send data to TestDino.
### Create a key
1. Select **Generate Key**.
2. Enter a **Key Name** and **Expiration (days)**, 1 to 365.
3. Create the key and store the secret in your secret manager.
### Manage keys
* **Copy or view details.** Use row actions to retrieve metadata as allowed.
* **Rotate.** Create a replacement key, update CI, then revoke the old key.
* **Revoke or delete.** Immediately invalidates the key.
Create and manage credentials for local or CI pipelines and tools that send data to TestDino.
### Create a key
1. Select **Generate Key**.
2. Enter a **Key Name** and **Expiration (days)**, 1 to 365.
3. Create the key and store the secret in your secret manager.
### Manage keys
* **Copy or view details.** Use row actions to retrieve metadata as allowed.
* **Rotate.** Create a replacement key, update CI, then revoke the old key.
* **Revoke or delete.** Immediately invalidates the key.
 Control which AI-powered features are active for this project. All AI features are enabled by default for new and existing projects.
### Master toggle
The **Enable AI Insights** toggle controls all AI features at once. Disable it to turn off every AI feature for the project. Enable it to restore individual feature settings.
### Individual feature toggles
When the master toggle is enabled, configure each AI feature independently:
| Feature | What it controls |
| :---------------------------- | :------------------------------------------------------------------------ |
| **AI Failure Classification** | Categorizes failures as Actual Bug, UI Change, Unstable, or Miscellaneous |
| **AI Failure Patterns** | Detects persistent, emerging, and regression patterns across runs |
| **AI Test Case Analysis** | Provides root cause analysis, recommendations, and quick fixes per test |
| **AI Error Grouping** | Groups similar errors by message and stack trace |
### Behavior
| Detail | Value |
| :----------------- | :------------------------------------------------ |
| Default state | All features enabled |
| When changes apply | From the next test run |
| Disabled features | Do not generate AI analysis or insights |
| Existing data | Previous AI insights remain visible for past runs |
| Permissions | Admin and Editor roles only |
Control which AI-powered features are active for this project. All AI features are enabled by default for new and existing projects.
### Master toggle
The **Enable AI Insights** toggle controls all AI features at once. Disable it to turn off every AI feature for the project. Enable it to restore individual feature settings.
### Individual feature toggles
When the master toggle is enabled, configure each AI feature independently:
| Feature | What it controls |
| :---------------------------- | :------------------------------------------------------------------------ |
| **AI Failure Classification** | Categorizes failures as Actual Bug, UI Change, Unstable, or Miscellaneous |
| **AI Failure Patterns** | Detects persistent, emerging, and regression patterns across runs |
| **AI Test Case Analysis** | Provides root cause analysis, recommendations, and quick fixes per test |
| **AI Error Grouping** | Groups similar errors by message and stack trace |
### Behavior
| Detail | Value |
| :----------------- | :------------------------------------------------ |
| Default state | All features enabled |
| When changes apply | From the next test run |
| Disabled features | Do not generate AI analysis or insights |
| Existing data | Previous AI insights remain visible for past runs |
| Permissions | Admin and Editor roles only |
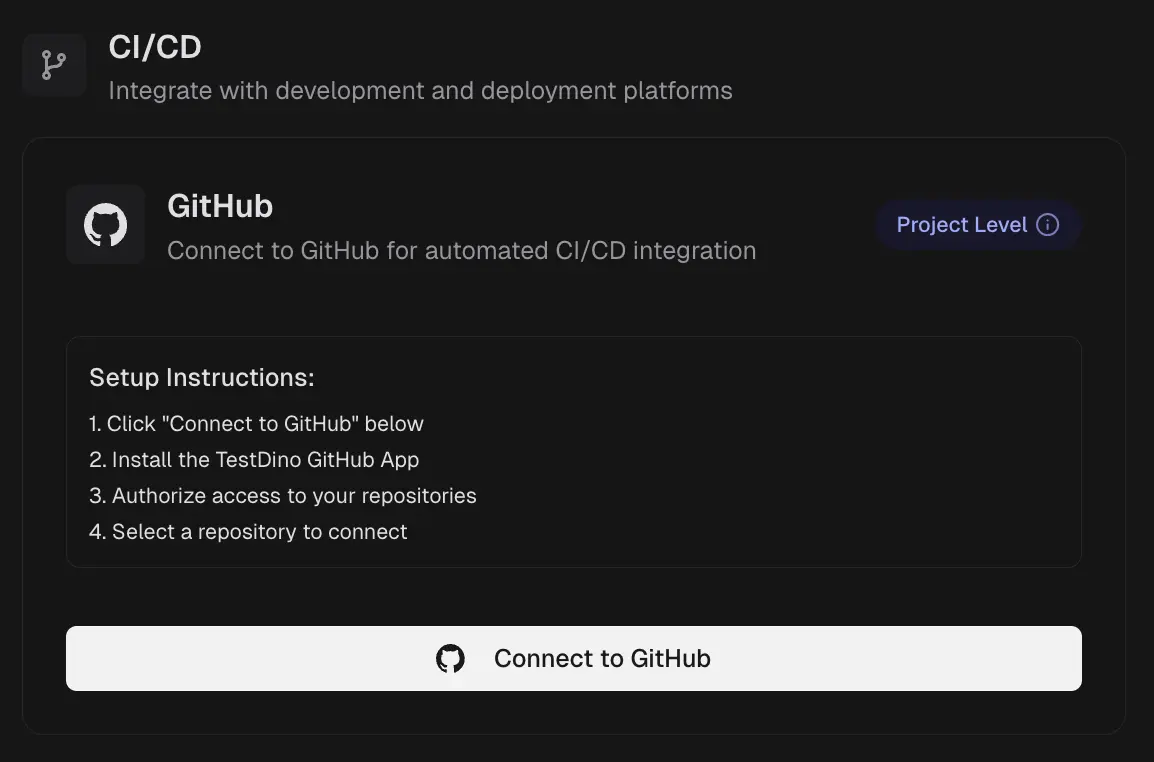 **GitHub** - Test-run summaries on commits and PRs.
**GitLab** - Test-run summaries on merge requests and commits. Only one Git provider (GitHub or GitLab) can be active per project.
**TeamCity** - Upload Playwright test reports from your TeamCity builds directly to TestDino.
### 2. Issue Tracking
**GitHub** - Test-run summaries on commits and PRs.
**GitLab** - Test-run summaries on merge requests and commits. Only one Git provider (GitHub or GitLab) can be active per project.
**TeamCity** - Upload Playwright test reports from your TeamCity builds directly to TestDino.
### 2. Issue Tracking
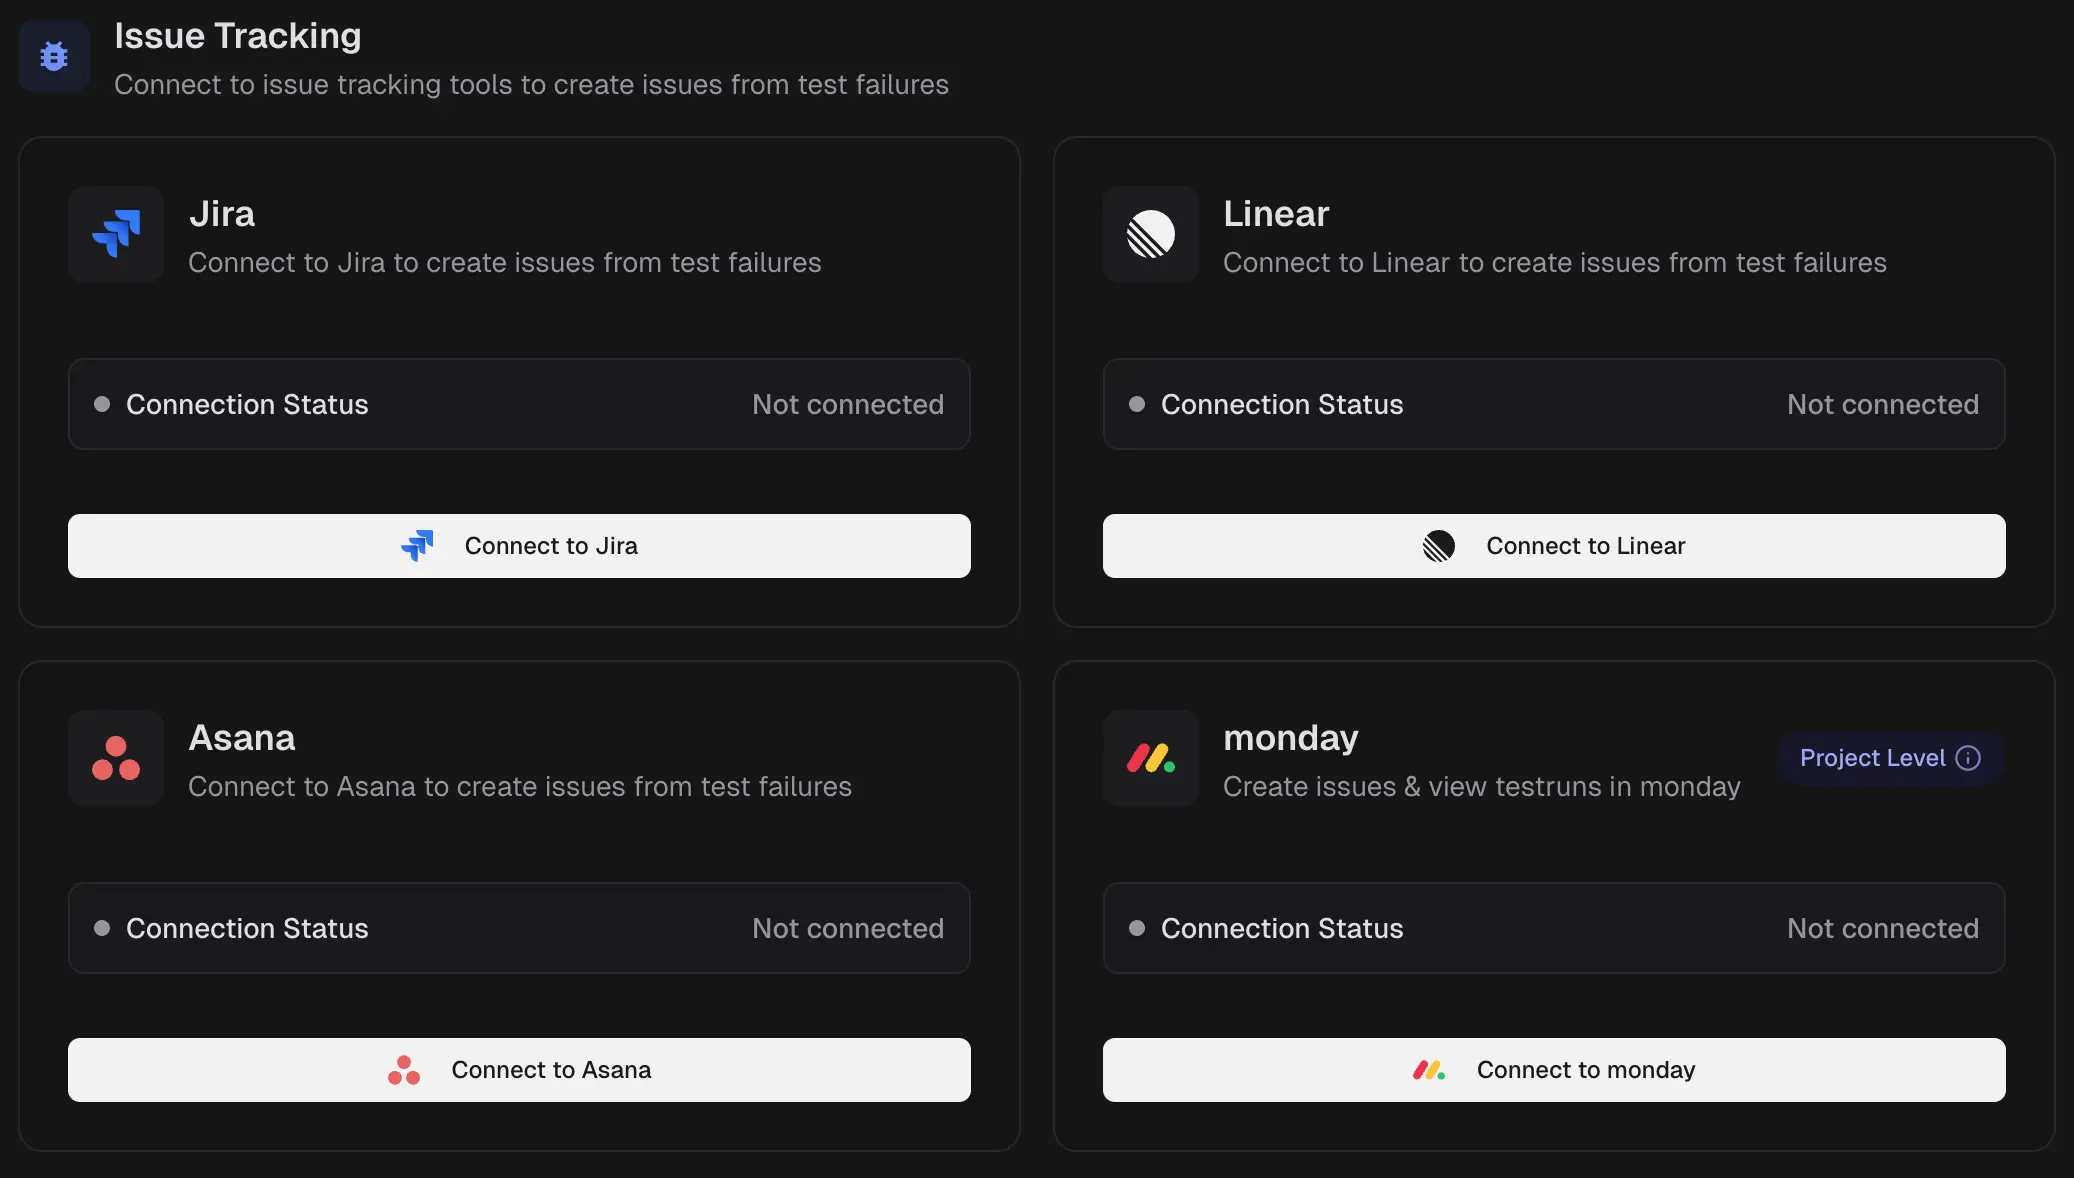 To create issues from failed or flaky tests, use:
* [Jira](/integrations/jira-playwright-test-failures)
* [Linear](/integrations/issue-tracking/linear)
* [Asana](/integrations/issue-tracking/asana)
* [monday](/integrations/issue-tracking/mon)
### 3. Communication
To create issues from failed or flaky tests, use:
* [Jira](/integrations/jira-playwright-test-failures)
* [Linear](/integrations/issue-tracking/linear)
* [Asana](/integrations/issue-tracking/asana)
* [monday](/integrations/issue-tracking/mon)
### 3. Communication
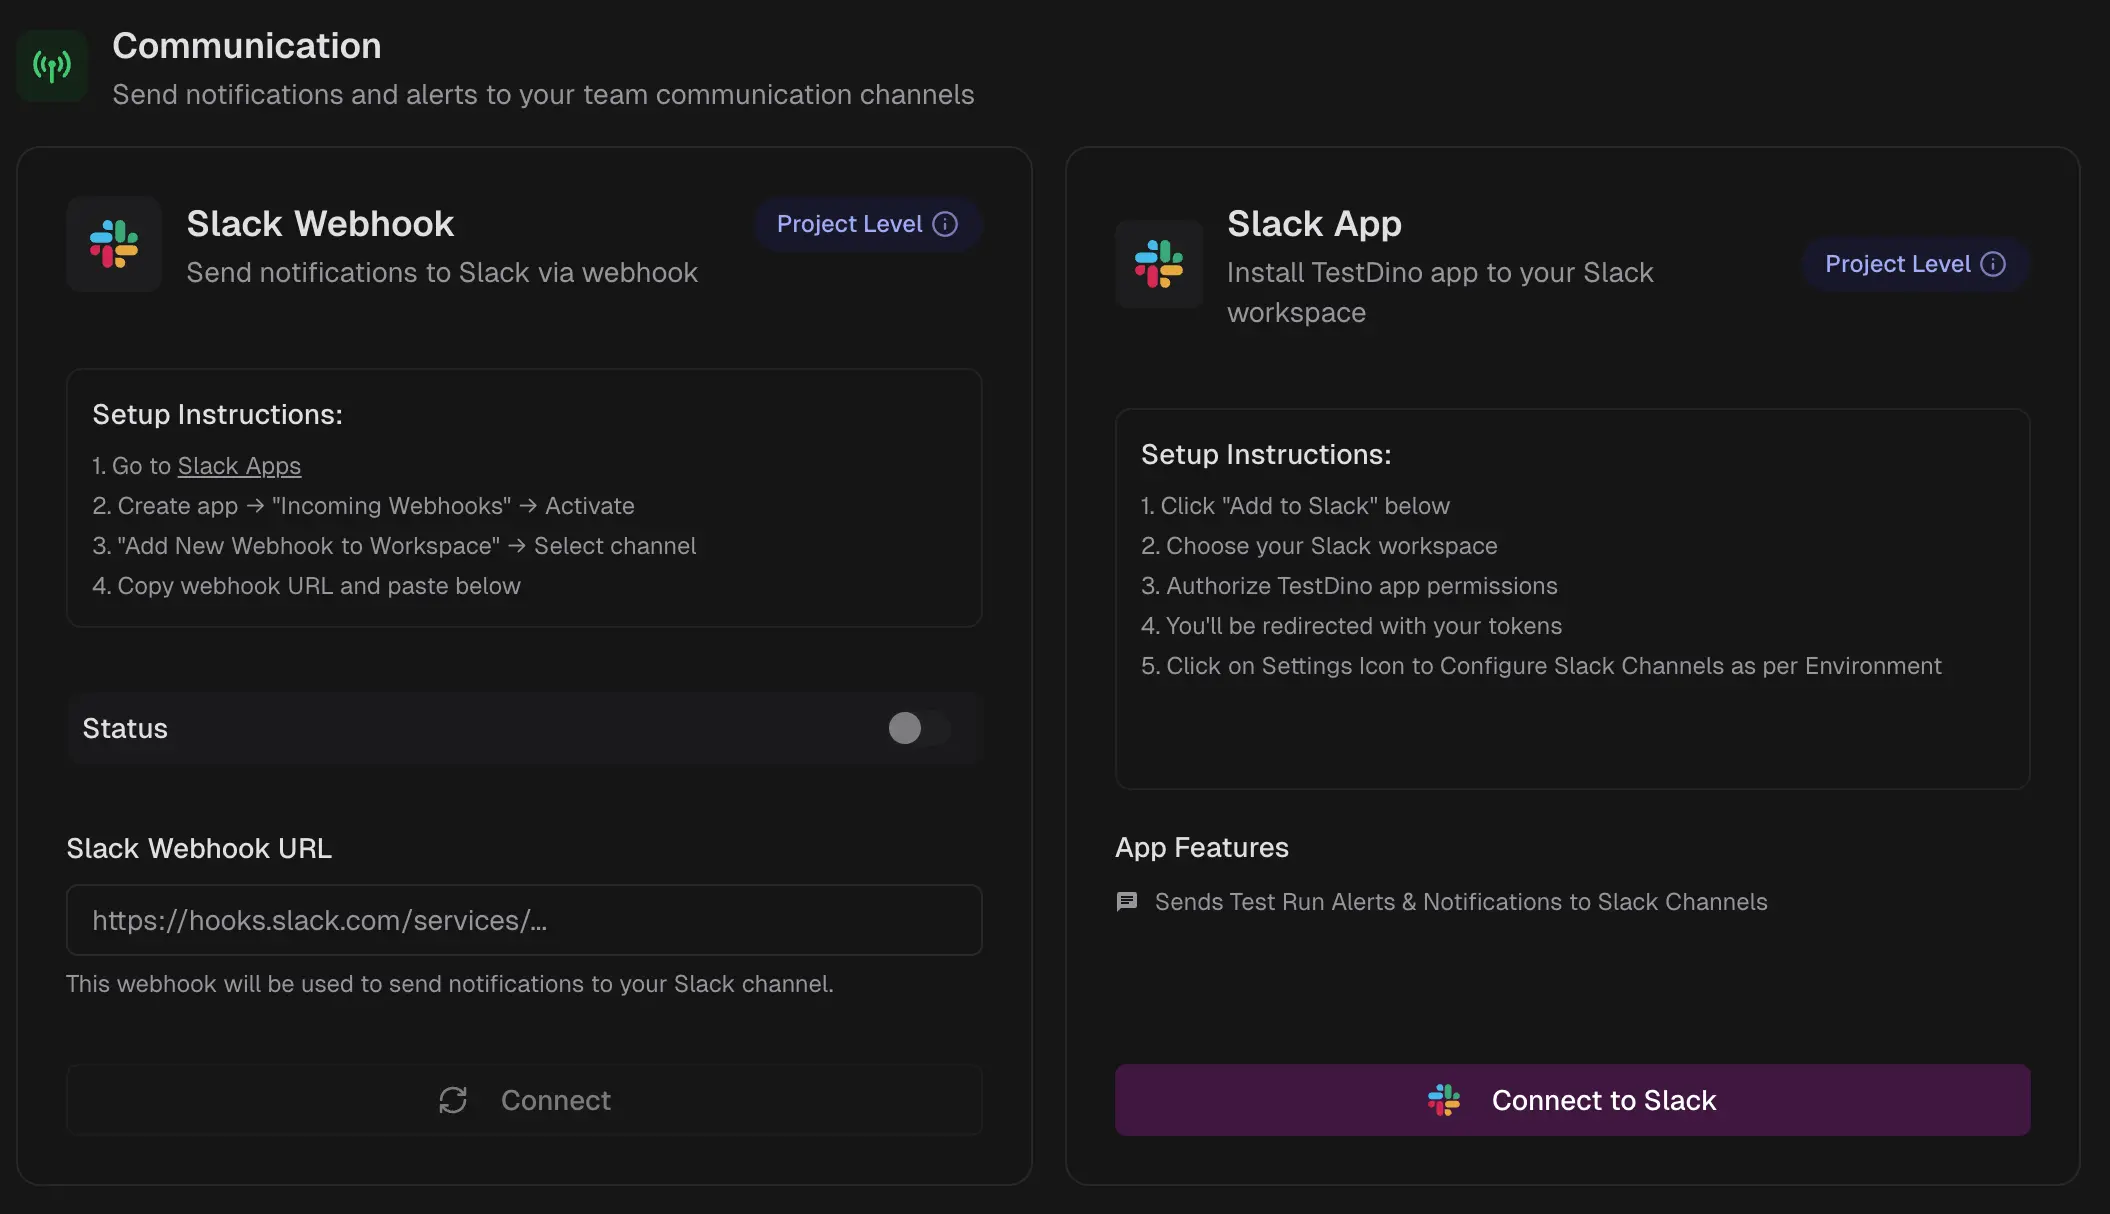 * **Slack Webhook** - posts a test run summary to the Slack channel.
* **Slack App** - posts a test run summary to the Slack channel mapped to the run’s branch environment.
* **Slack Webhook** - posts a test run summary to the Slack channel.
* **Slack App** - posts a test run summary to the Slack channel mapped to the run’s branch environment.
 ### Why it matters
End-to-end tests often run on pull requests and short-lived branches. Without mapping, those runs fragment across dozens of branch names.
Mapping rolls them up to the right environment, so pass rates, volumes, and alerts reflect reality.
### Add or edit an environment
1. Enter **Name** and a short **Label** used in chips and filters.
2. Optionally set a **Description** and color.
3. Define **Branch patterns**:
* **Exact match** to bind a single branch, for example, `main`.
* **Pattern match** to bind many branches, for example, `feature/*`, `release/*`, `hotfix/*`.
4. Save. Changes can take up to 2 minutes to apply.
### Why it matters
End-to-end tests often run on pull requests and short-lived branches. Without mapping, those runs fragment across dozens of branch names.
Mapping rolls them up to the right environment, so pass rates, volumes, and alerts reflect reality.
### Add or edit an environment
1. Enter **Name** and a short **Label** used in chips and filters.
2. Optionally set a **Description** and color.
3. Define **Branch patterns**:
* **Exact match** to bind a single branch, for example, `main`.
* **Pattern match** to bind many branches, for example, `feature/*`, `release/*`, `hotfix/*`.
4. Save. Changes can take up to 2 minutes to apply.
 ### Why it matters
Active projects accumulate dozens or hundreds of branches. Branch filters list them in raw or alphabetical order, so the few branches that matter get buried. Pinning floats them to the top for everyone on the project, across the Test Runs and Analytics filters.
### Pin branches
1. Go to **Project Settings → Branch Mapping → Filter Customization**.
2. On the **Branch** row, select **Configure**.
### Why it matters
Active projects accumulate dozens or hundreds of branches. Branch filters list them in raw or alphabetical order, so the few branches that matter get buried. Pinning floats them to the top for everyone on the project, across the Test Runs and Analytics filters.
### Pin branches
1. Go to **Project Settings → Branch Mapping → Filter Customization**.
2. On the **Branch** row, select **Configure**.
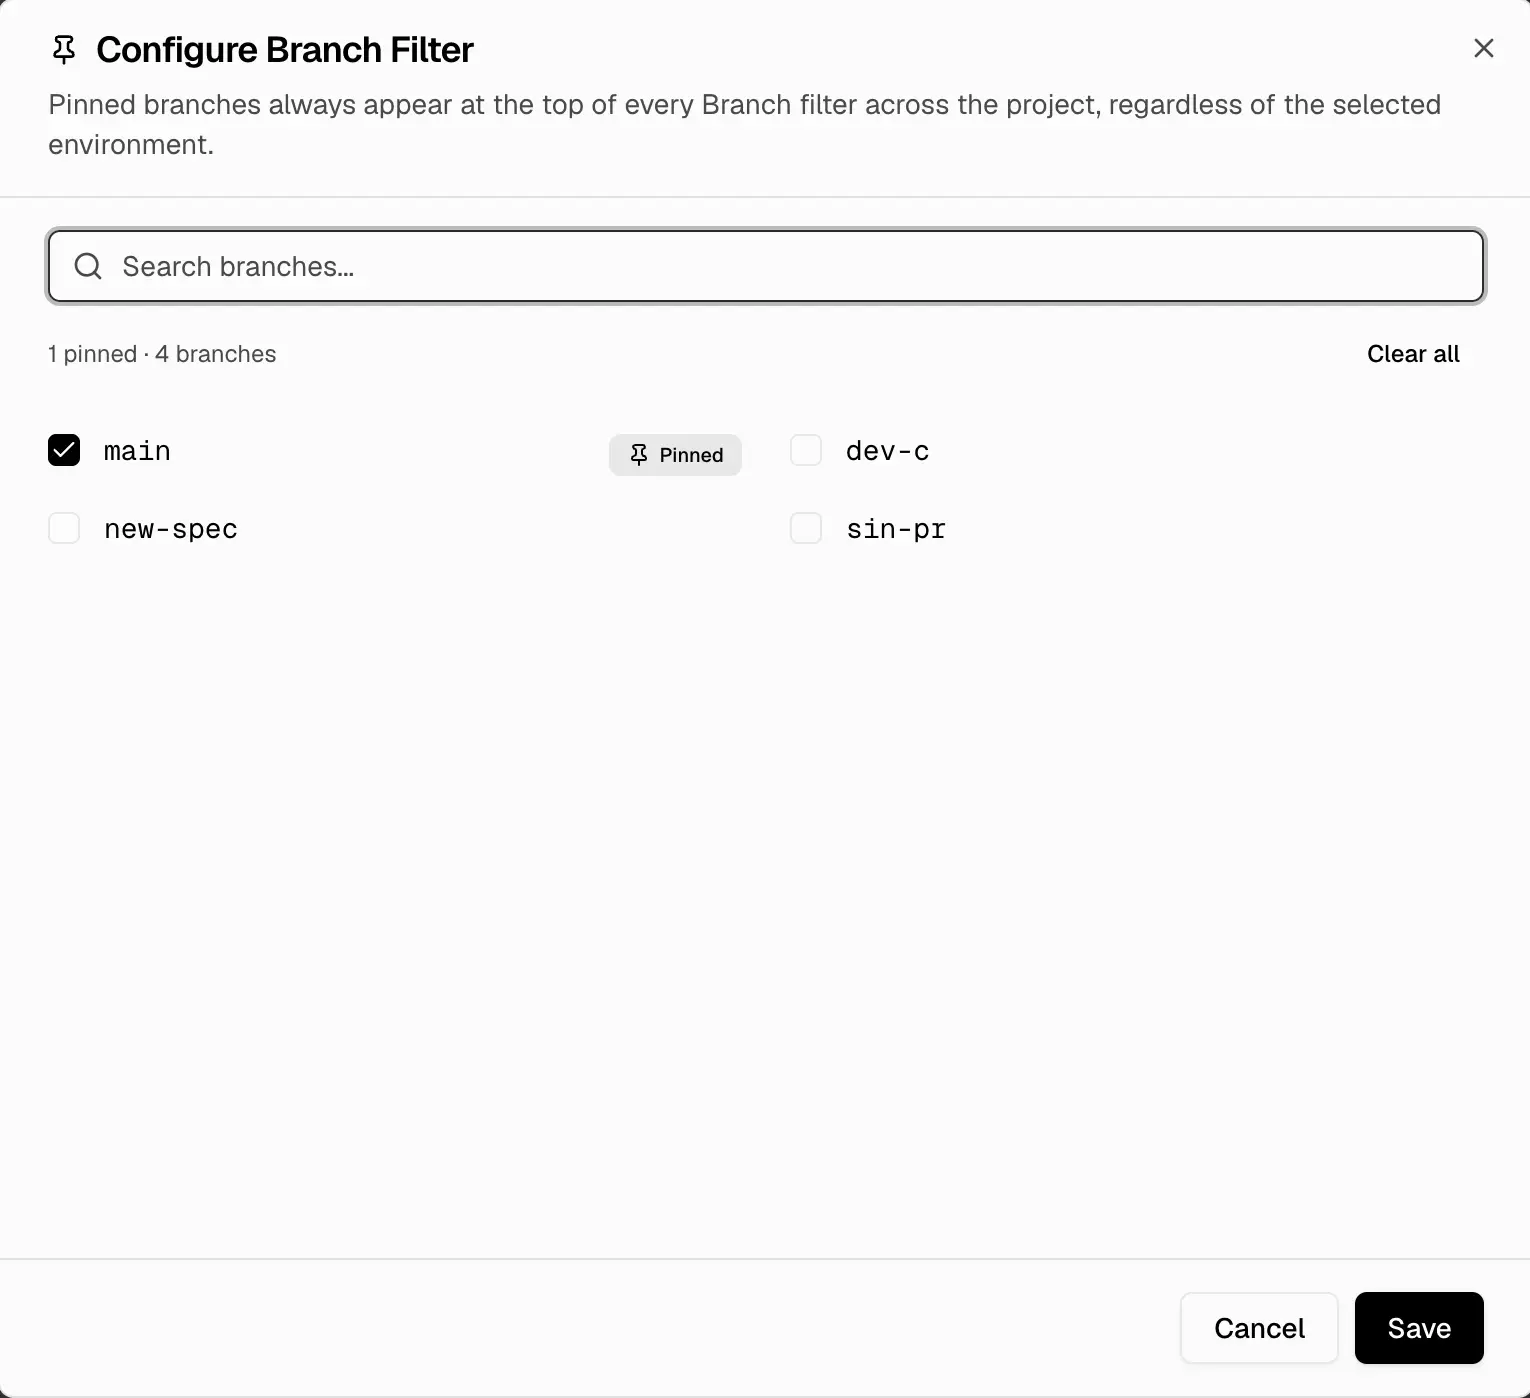 3. In the dialog, search for branches and tick the ones to pin. Pinned branches move to the top of the list.
4. Select **Save**. The pinned branches apply across the project immediately.
To unpin, open **Configure** again, clear the branches or use **Clear all**, then save.
### Behavior
| Detail | Value |
| :----------------- | :---------------------------------------------------------------------------------------------------- |
| Scope | Project-wide. Applies to every member. |
| Where it applies | Every Branch filter (Test Runs and Analytics) |
| Ordering | Pinned branches appear first, regardless of the selected environment; the rest keep their usual order |
| No branches pinned | Filters behave exactly as before |
| Branch source | Actual branch names from your test runs; patterns and regex can't be pinned |
| Limit | Up to 200 pinned branches |
| Permissions | Admins can edit; all members see the effect |
3. In the dialog, search for branches and tick the ones to pin. Pinned branches move to the top of the list.
4. Select **Save**. The pinned branches apply across the project immediately.
To unpin, open **Configure** again, clear the branches or use **Clear all**, then save.
### Behavior
| Detail | Value |
| :----------------- | :---------------------------------------------------------------------------------------------------- |
| Scope | Project-wide. Applies to every member. |
| Where it applies | Every Branch filter (Test Runs and Analytics) |
| Ordering | Pinned branches appear first, regardless of the selected environment; the rest keep their usual order |
| No branches pinned | Filters behave exactly as before |
| Branch source | Actual branch names from your test runs; patterns and regex can't be pinned |
| Limit | Up to 200 pinned branches |
| Permissions | Admins can edit; all members see the effect |