> ## Documentation Index
> Fetch the complete documentation index at: https://docs.testdino.com/llms.txt
> Use this file to discover all available pages before exploring further.
# Test Cases
> Search, sort, and filter test cases in a flat list, and view full details with tabs for overview, attachments, history, and linked tests.
**What you'll learn**
* How to create and edit a test case
* How to search, sort, and filter the flat list
* How to configure which badges display on each row
* What lives on the Details Sheet: content, attachments, link automation, properties, and activity
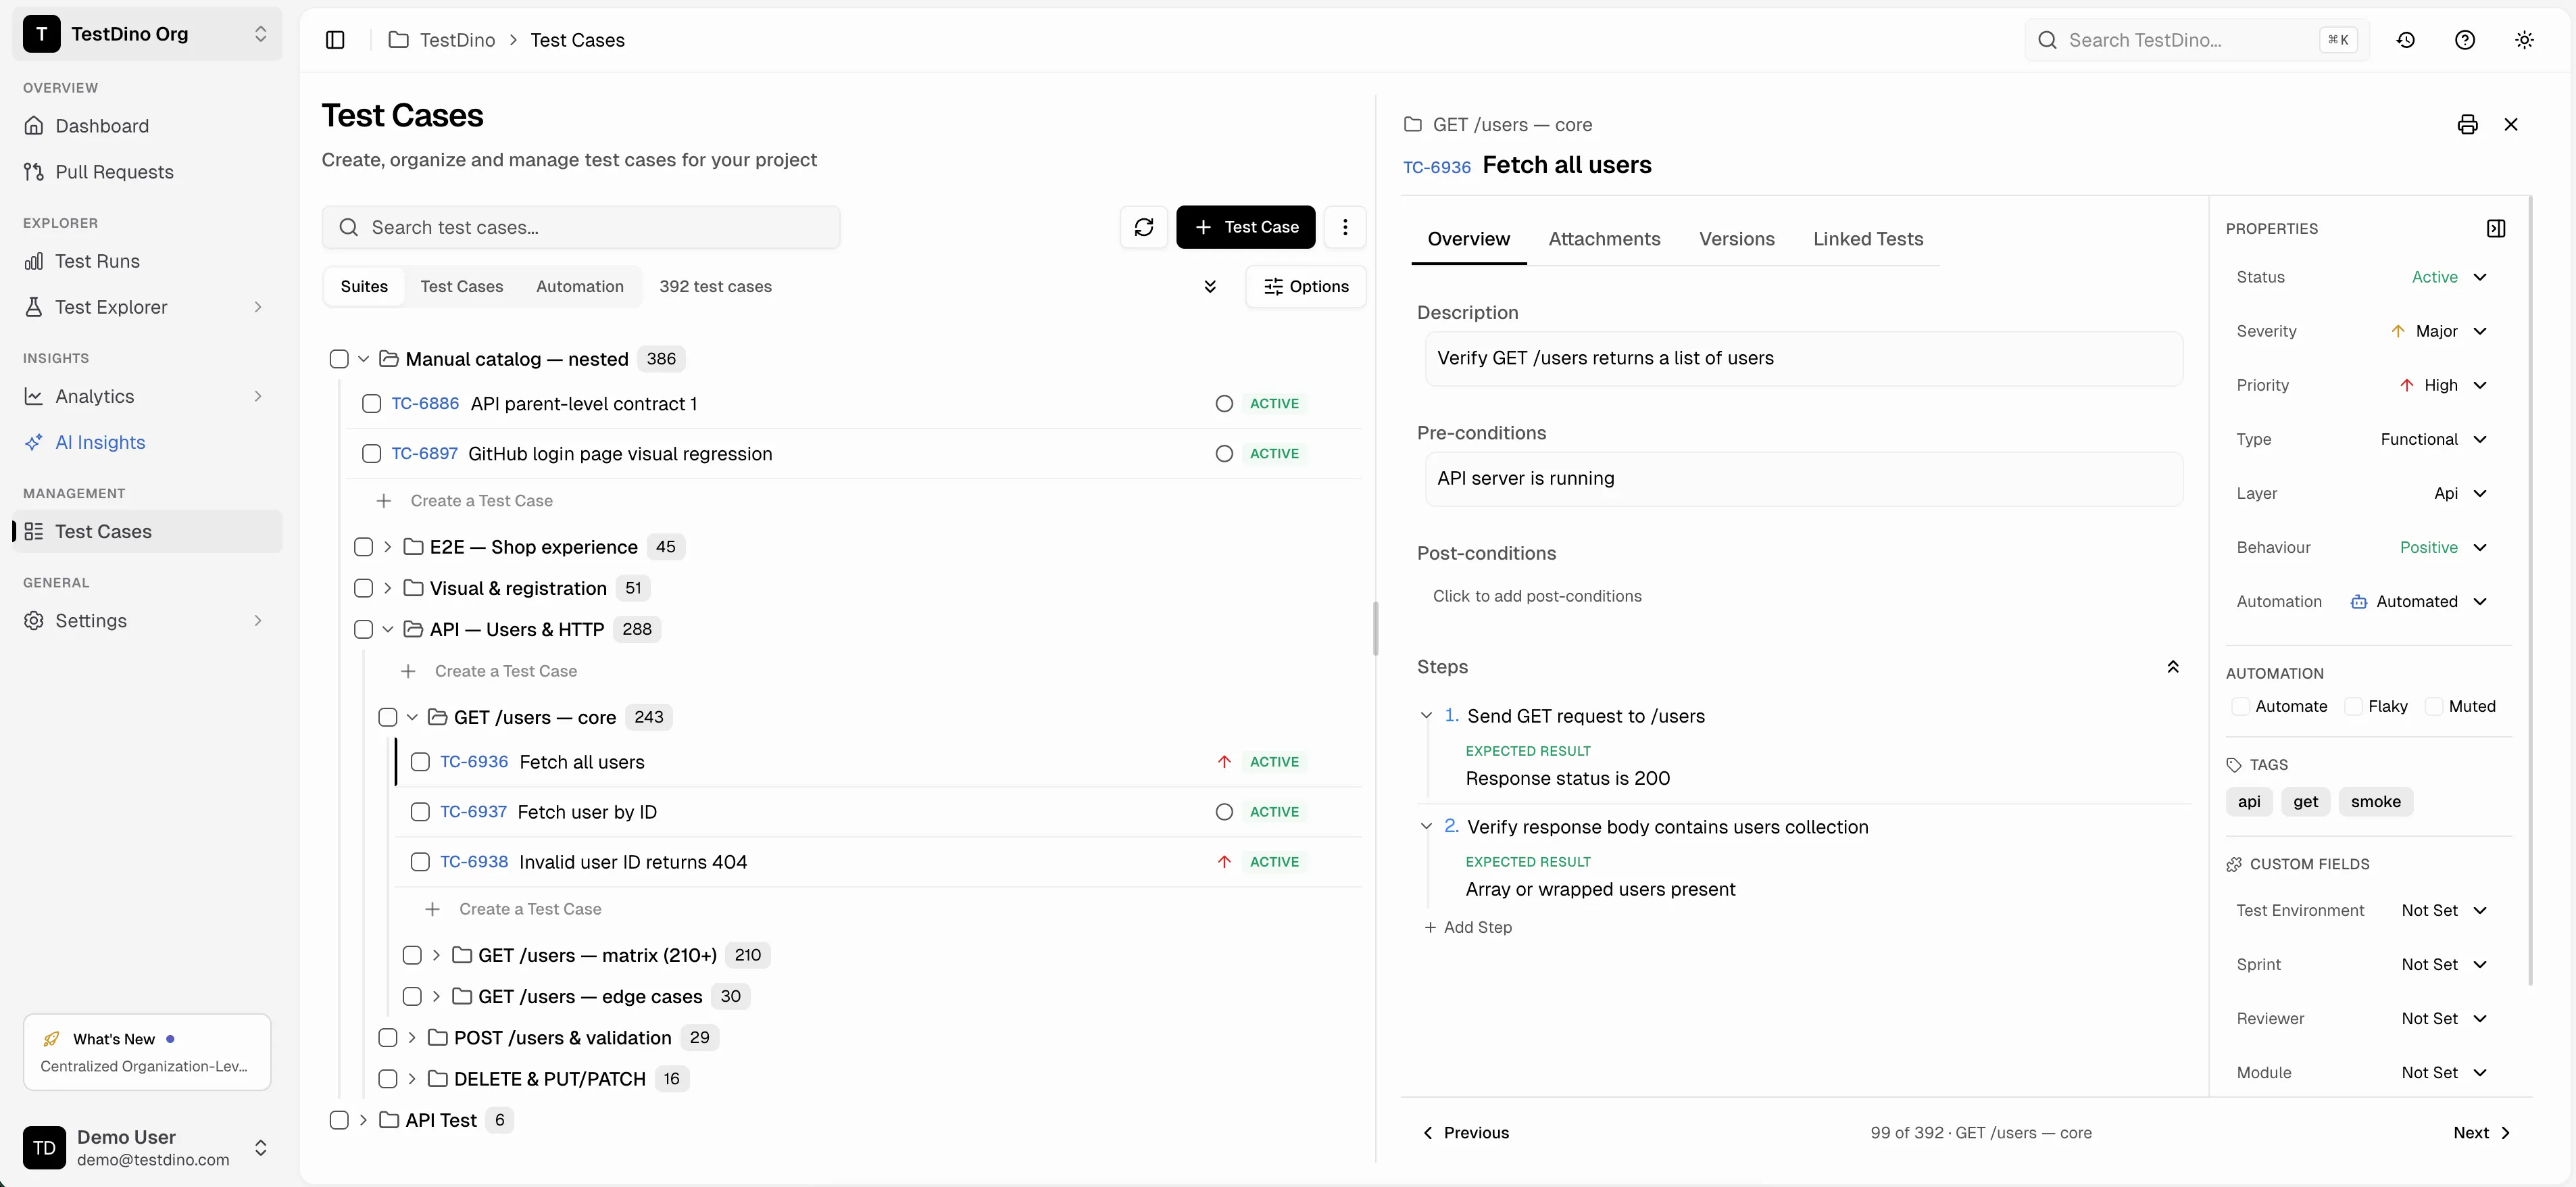
The Test Cases view shows a flat list of all test cases across all suites. This view is useful when you want to search, sort, or filter without navigating the suite hierarchy.
 ## Create Or Edit Test Case
Click **+ New** in the header to open the **New test case** slide-over. To edit an existing case, open it from the list and click **Edit** in the Details Sheet header. The form is split into four sections.
### Classification
| Field | Description |
| :----------- | :------------------------------------------------------------------------ |
| `Test Suite` | Suite the case belongs to (defaults to the suite selected in the sidebar) |
| `Priority` | Priority dropdown (`Critical`, `High`, `Medium`, `Low`, `Not Set`) |
| `Type` | Type dropdown (`Smoke`, `Regression`, `Functional`, `Other`, etc.) |
| `Automation` | Automation status (`Manual`, `Automated`, `To Be Automated`) |
### Steps
Switch between **Classic** and **Gherkin** with the tabs above Step 1.
| Format | Step fields |
| :-------- | :-------------------------------------------------------------------- |
| `Classic` | `Action` (what to perform), `Test Data` (optional), `Expected Result` |
| `Gherkin` | Keyword (`Given`, `When`, `Then`, `And`, `But`) + text |
Click **+ Add Step** to add more steps. Expand **Add pre/postconditions** to set what must be true before the case runs and the expected system state after.
### Tags
Type a tag and press Enter (or click **Add**) to attach a tag. Tags appear as badges on the case row in the list and in the Details Sheet.
### Advanced
Advanced fields are hidden by default. Expand this section to set `Severity`, `Layer`, `Behavior`, and automation flags like `To Be Automated`, `Is Flaky`, and `Is Muted`.
## Search
Use the search bar at the top to find test cases by title. Results update as you type.
## Sort and Filter
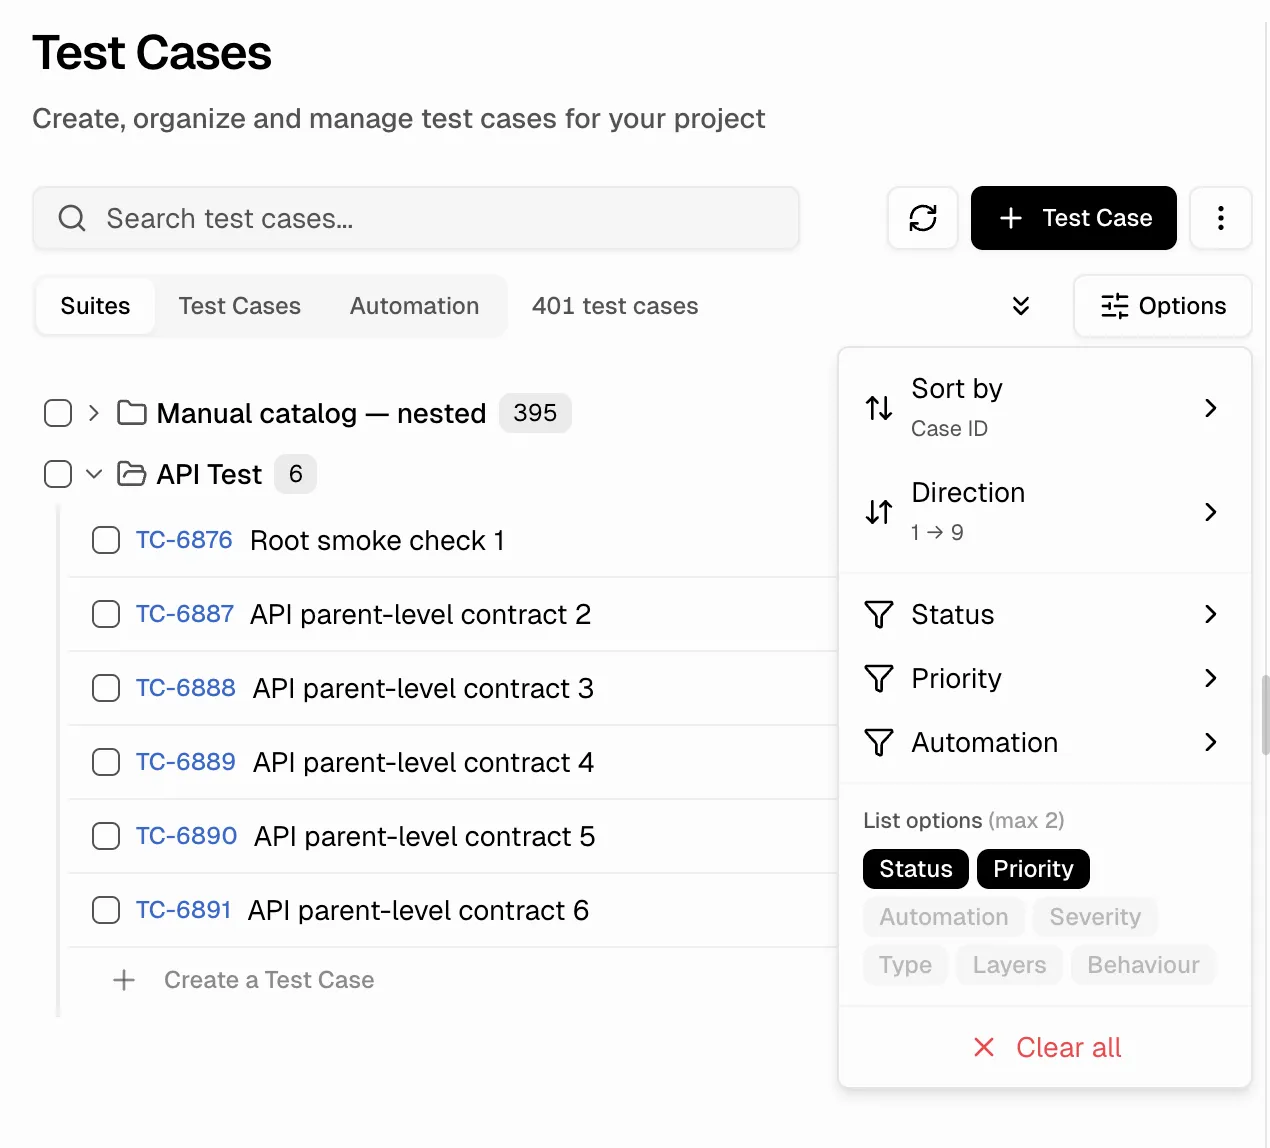
Click the **Options** button to access sort and filter controls.
| Option | Description |
| :--------- | :---------------------------------------------- |
| Sort by | Case ID (default), Last Updated, or Title |
| Direction | Ascending (1→9) or Descending (9→1) |
| Status | Filter by Active, Draft, or Deprecated |
| Priority | Filter by Critical, High, Medium, or Low |
| Automation | Filter by Manual, Automated, or To Be Automated |
Active filters are indicated by a badge count on the **Options** button.
## Create Or Edit Test Case
Click **+ New** in the header to open the **New test case** slide-over. To edit an existing case, open it from the list and click **Edit** in the Details Sheet header. The form is split into four sections.
### Classification
| Field | Description |
| :----------- | :------------------------------------------------------------------------ |
| `Test Suite` | Suite the case belongs to (defaults to the suite selected in the sidebar) |
| `Priority` | Priority dropdown (`Critical`, `High`, `Medium`, `Low`, `Not Set`) |
| `Type` | Type dropdown (`Smoke`, `Regression`, `Functional`, `Other`, etc.) |
| `Automation` | Automation status (`Manual`, `Automated`, `To Be Automated`) |
### Steps
Switch between **Classic** and **Gherkin** with the tabs above Step 1.
| Format | Step fields |
| :-------- | :-------------------------------------------------------------------- |
| `Classic` | `Action` (what to perform), `Test Data` (optional), `Expected Result` |
| `Gherkin` | Keyword (`Given`, `When`, `Then`, `And`, `But`) + text |
Click **+ Add Step** to add more steps. Expand **Add pre/postconditions** to set what must be true before the case runs and the expected system state after.
### Tags
Type a tag and press Enter (or click **Add**) to attach a tag. Tags appear as badges on the case row in the list and in the Details Sheet.
### Advanced
Advanced fields are hidden by default. Expand this section to set `Severity`, `Layer`, `Behavior`, and automation flags like `To Be Automated`, `Is Flaky`, and `Is Muted`.
## Search
Use the search bar at the top to find test cases by title. Results update as you type.
## Sort and Filter
Click the **Options** button to access sort and filter controls.
| Option | Description |
| :--------- | :---------------------------------------------- |
| Sort by | Case ID (default), Last Updated, or Title |
| Direction | Ascending (1→9) or Descending (9→1) |
| Status | Filter by Active, Draft, or Deprecated |
| Priority | Filter by Critical, High, Medium, or Low |
| Automation | Filter by Manual, Automated, or To Be Automated |
Active filters are indicated by a badge count on the **Options** button.
 ## Clear Filters
Click **Clear all** at the bottom of the Options dropdown to reset all filters and sorting to defaults.
## Details Sheet
Click any test case row to open the Details Sheet from the right side. It shows all test case information on a single scrollable page without tabs.
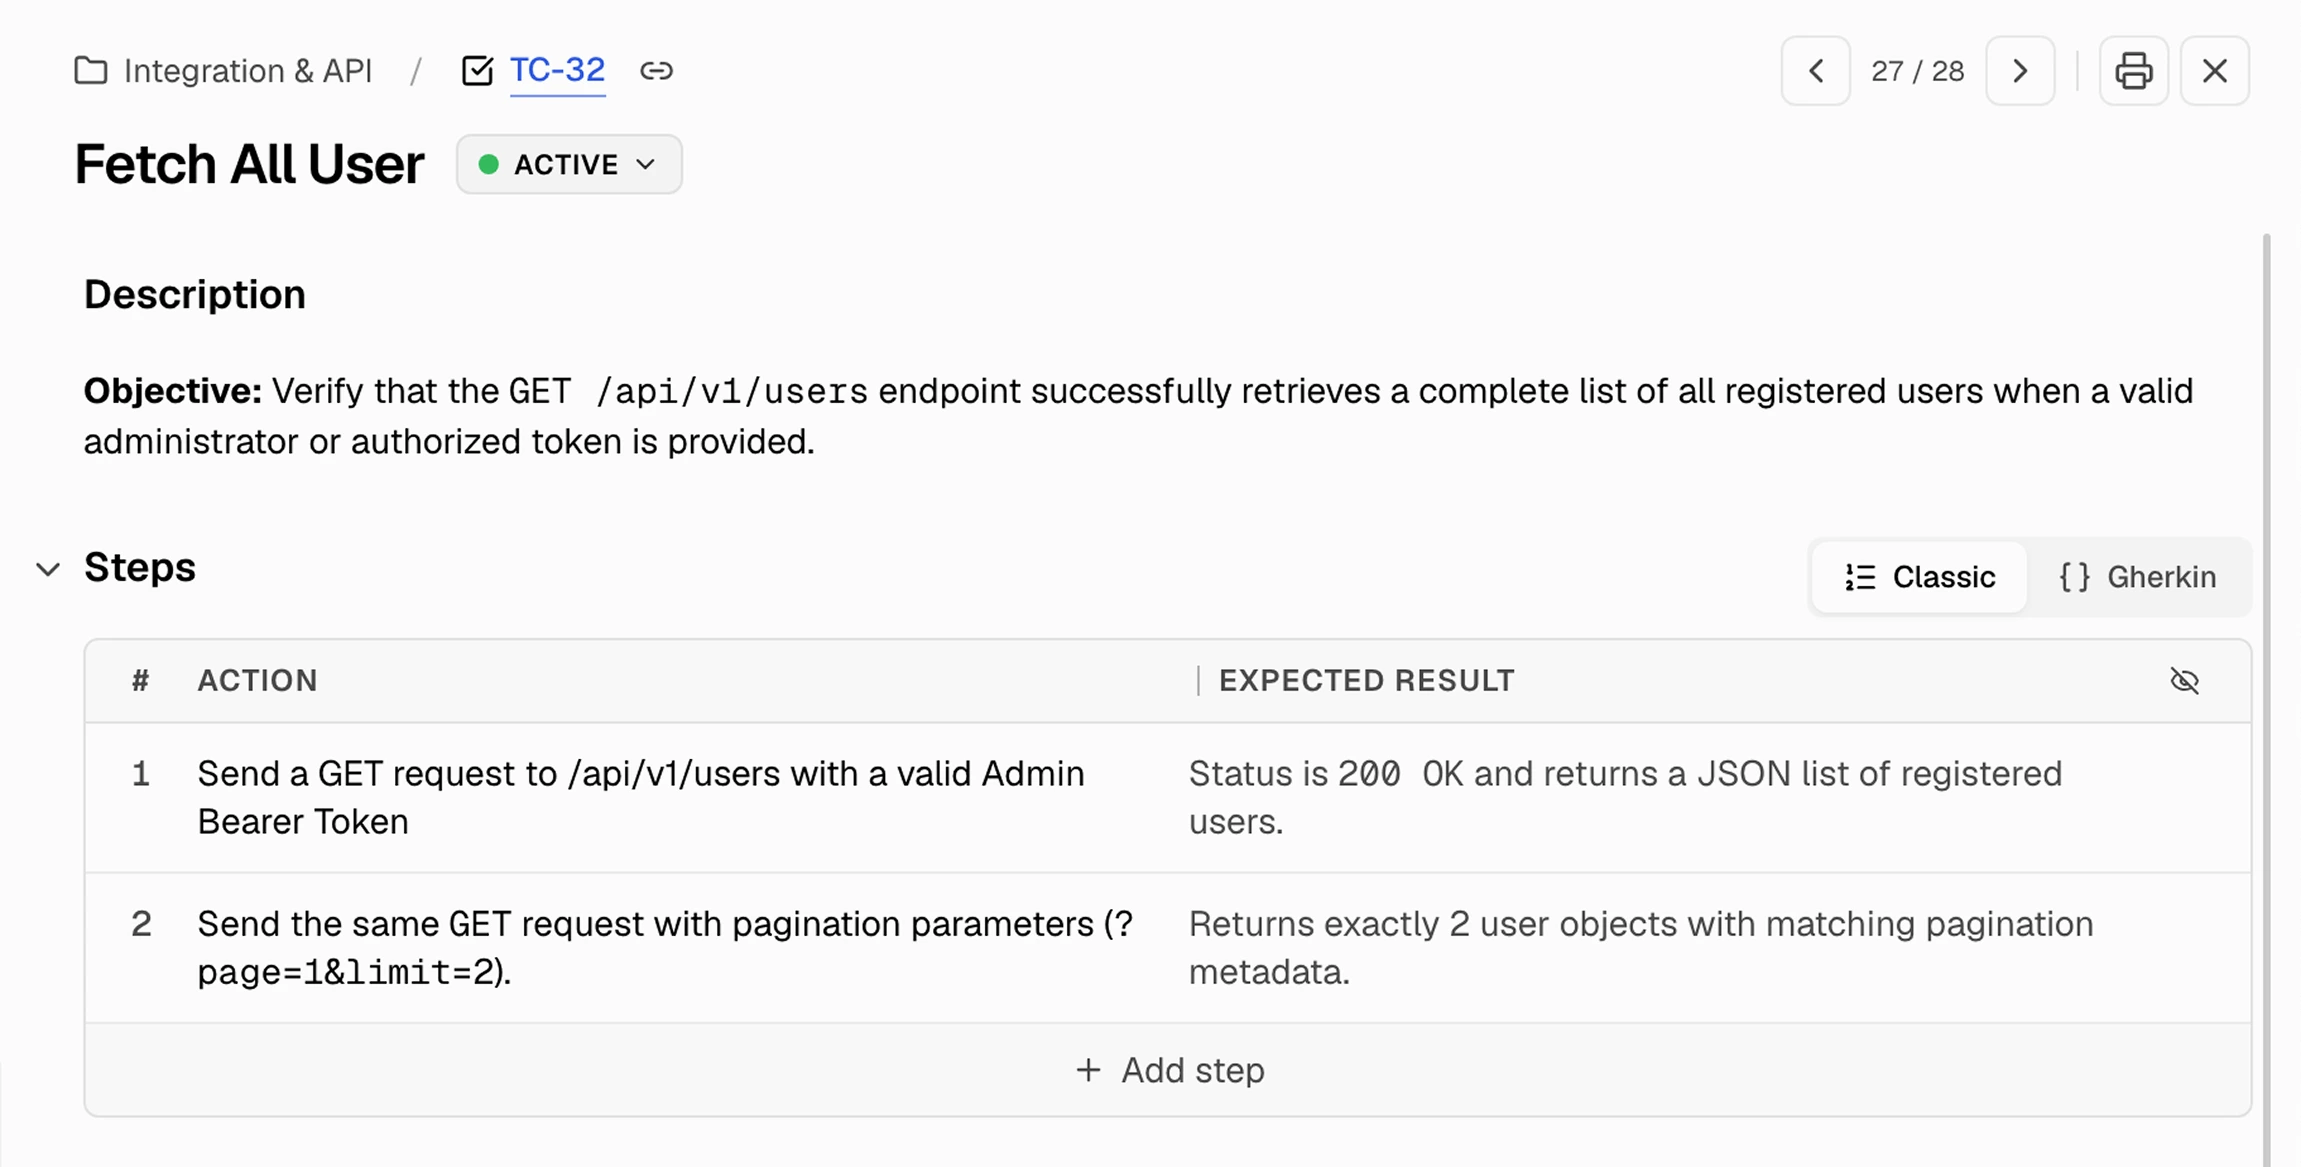
The header includes the suite path, case ID with copy link, pagination controls, print option, close button, and status badge. You can update the test case status directly from the header dropdown.
### Description
The Description section gives a brief overview of what the test case is meant to validate, helping users quickly understand its purpose and scope before execution.
### Steps
The Steps section defines the test execution flow using `Action` and `Expected Result` columns. Users can switch between **Classic** and **Gherkin** views and hide or show the `Expected Result` column using an eye icon.
Steps support images, screenshot-only evidence, and pinned attachments. New steps can be added using the **+ Add Step** button.
## Clear Filters
Click **Clear all** at the bottom of the Options dropdown to reset all filters and sorting to defaults.
## Details Sheet
Click any test case row to open the Details Sheet from the right side. It shows all test case information on a single scrollable page without tabs.
The header includes the suite path, case ID with copy link, pagination controls, print option, close button, and status badge. You can update the test case status directly from the header dropdown.
### Description
The Description section gives a brief overview of what the test case is meant to validate, helping users quickly understand its purpose and scope before execution.
### Steps
The Steps section defines the test execution flow using `Action` and `Expected Result` columns. Users can switch between **Classic** and **Gherkin** views and hide or show the `Expected Result` column using an eye icon.
Steps support images, screenshot-only evidence, and pinned attachments. New steps can be added using the **+ Add Step** button.
 ### Pre-conditions and Post-conditions
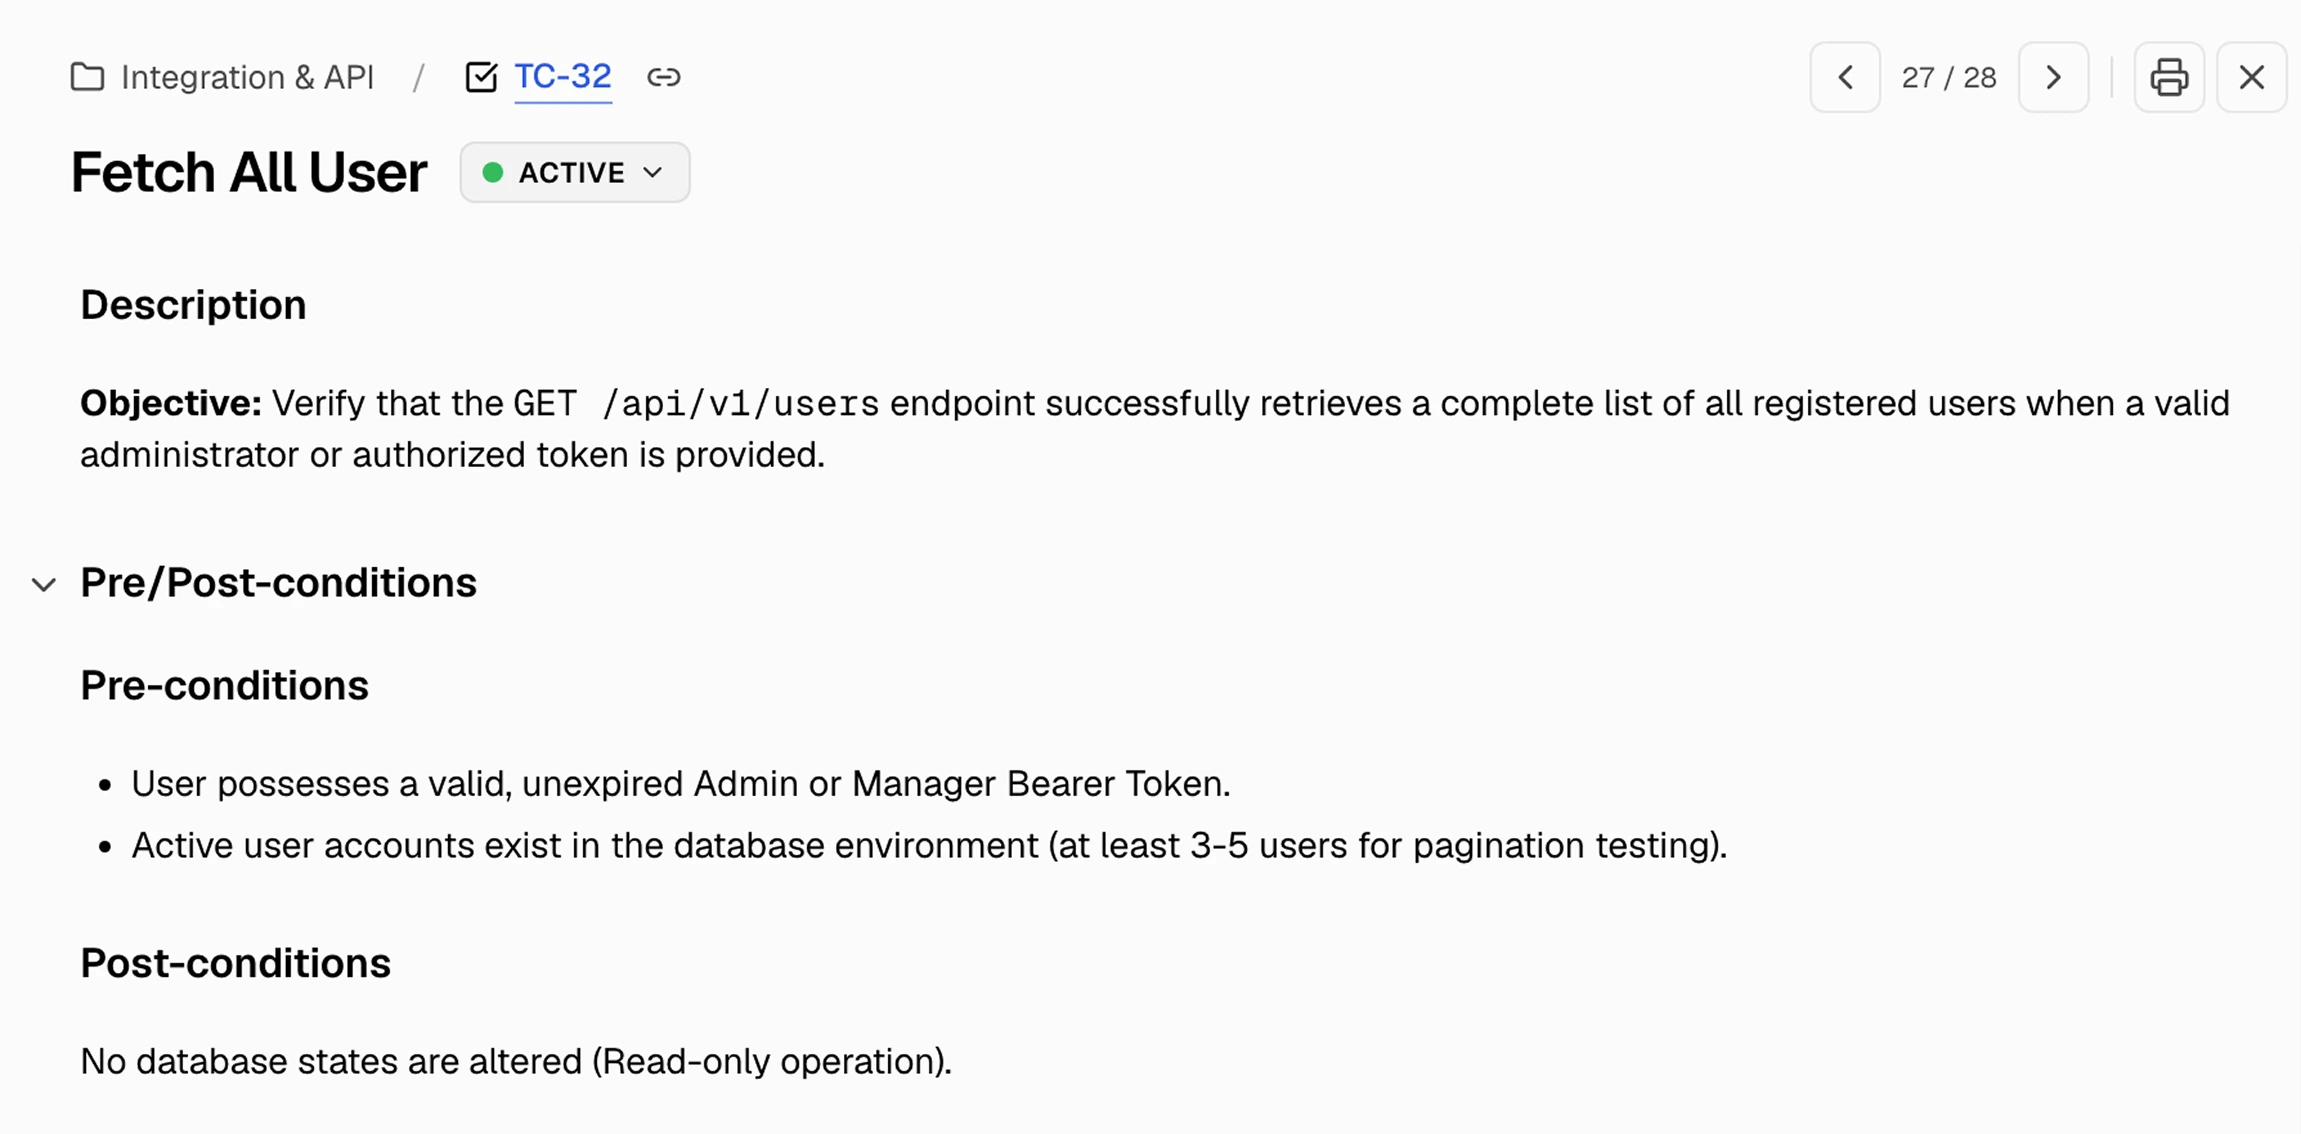
This section appears below Steps as a collapsible block, where Pre-conditions define the required setup or system state that must be in place before execution begins, and Post-conditions define the expected system state after execution is completed.
### Pre-conditions and Post-conditions
This section appears below Steps as a collapsible block, where Pre-conditions define the required setup or system state that must be in place before execution begins, and Post-conditions define the expected system state after execution is completed.
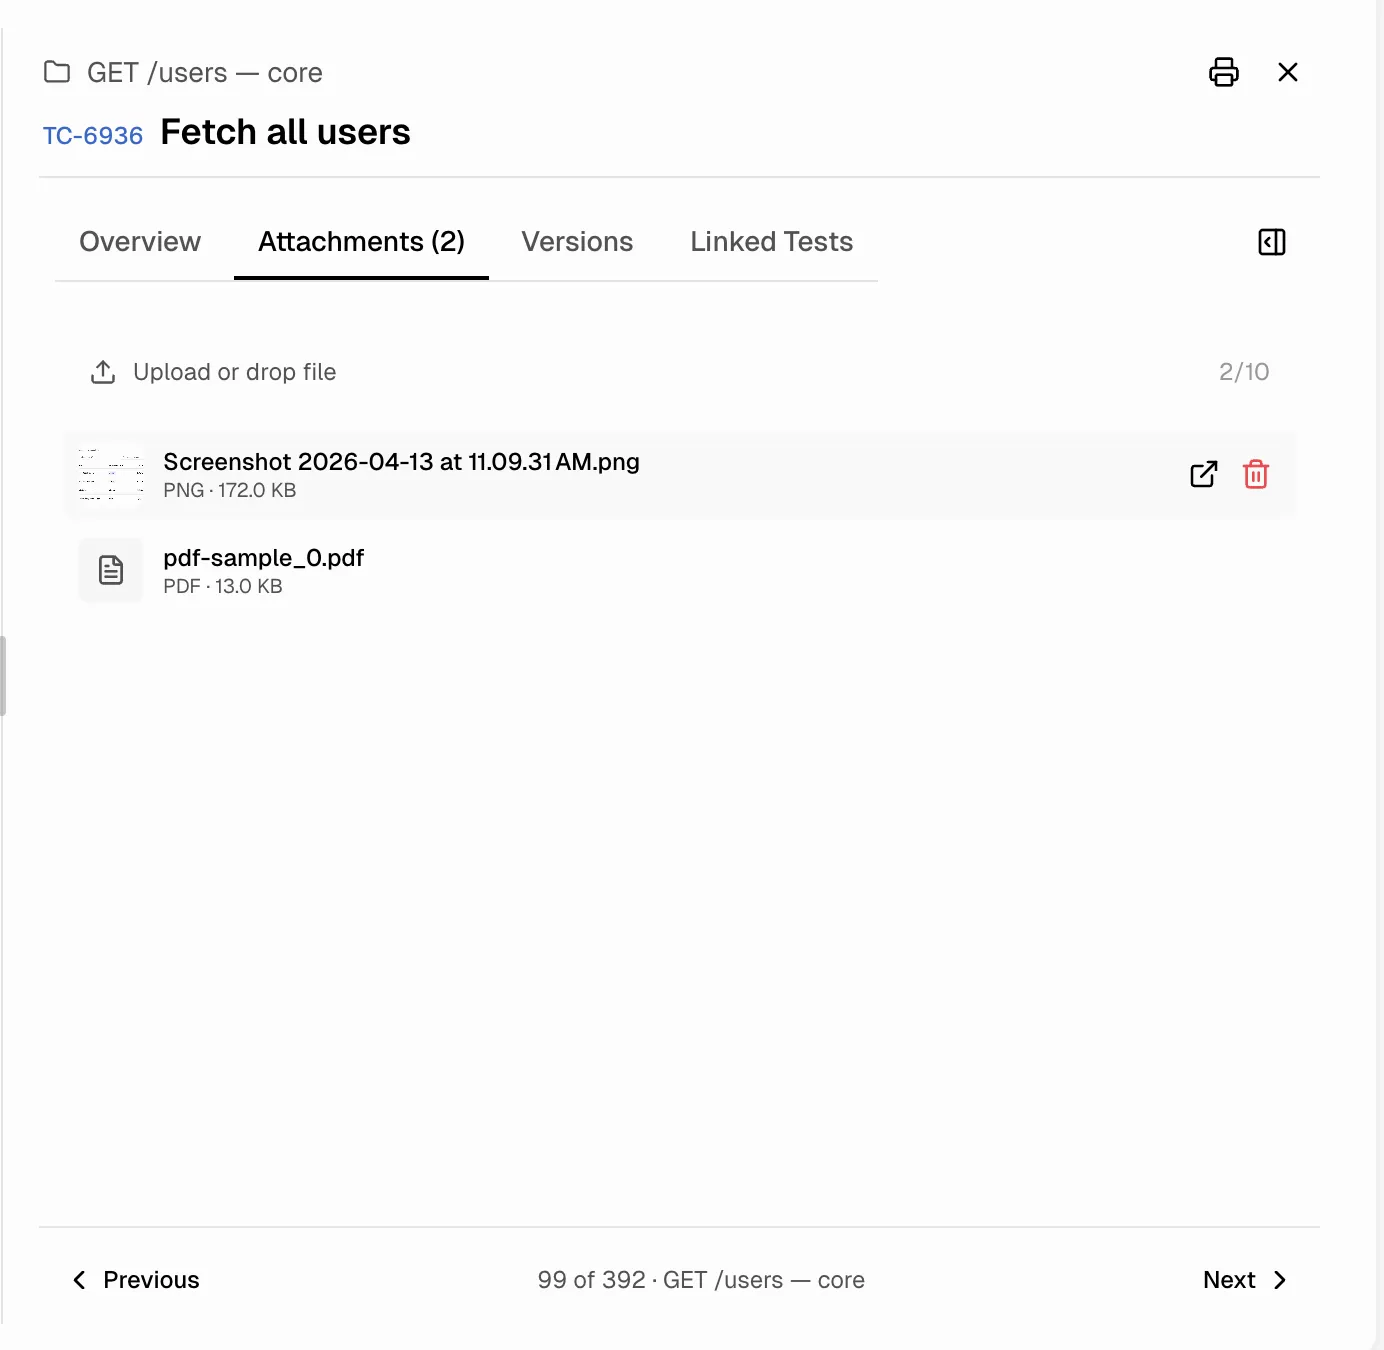
 ### Attachments
Drag-and-drop or browse to upload. A case allows up to **10 attachments total**.
### Attachments
Drag-and-drop or browse to upload. A case allows up to **10 attachments total**.
 ### Linked Tests
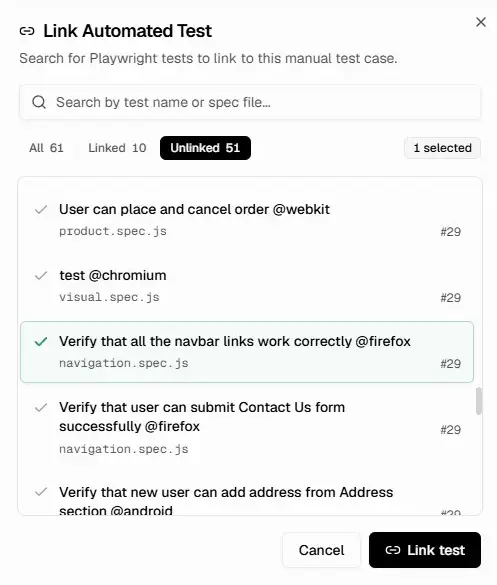
View automated Playwright tests linked to the manual test case with execution details like status, run, branch, and date.
* If no tests are linked, a **Link automation** button appears. Once linked, a **+ Link** button is shown to add more tests.
* Link tests using search by name or spec file and filters like **All**, **Linked**, or **Unlinked**.
### Linked Tests
View automated Playwright tests linked to the manual test case with execution details like status, run, branch, and date.
* If no tests are linked, a **Link automation** button appears. Once linked, a **+ Link** button is shown to add more tests.
* Link tests using search by name or spec file and filters like **All**, **Linked**, or **Unlinked**.
 ### Properties
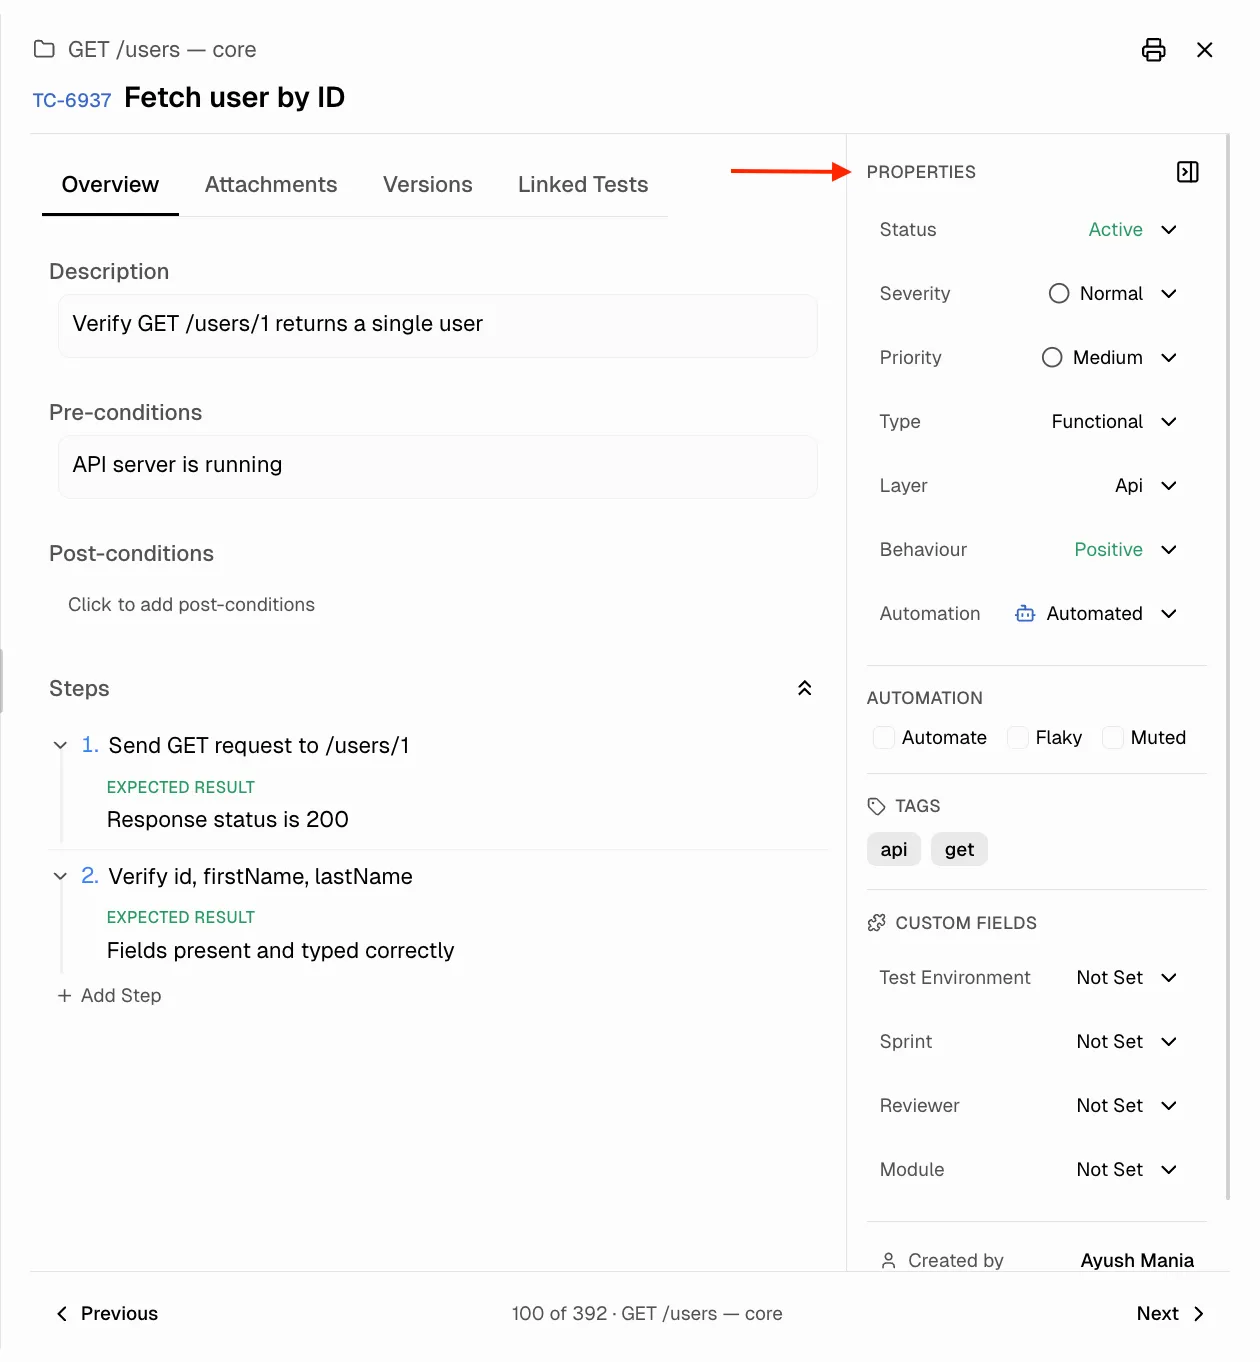
The Properties section shows `Status`, `Priority`, `Suite`, `Tags`, and `Automation status` by default. Click **More properties** to reveal two more groups:
* **Basic** - `Type`, `Severity`, `Reporter`, `Created`, `Updated`
* **Advanced** - `Layer`, `Behavior`, `Flags`
Each value is editable via its dropdown. Any project-specific custom fields from [Test Case Settings](/test-management/key-concepts#custom-fields) appear here too.
### Properties
The Properties section shows `Status`, `Priority`, `Suite`, `Tags`, and `Automation status` by default. Click **More properties** to reveal two more groups:
* **Basic** - `Type`, `Severity`, `Reporter`, `Created`, `Updated`
* **Advanced** - `Layer`, `Behavior`, `Flags`
Each value is editable via its dropdown. Any project-specific custom fields from [Test Case Settings](/test-management/key-concepts#custom-fields) appear here too.
 ### Activity
Four tabs at the bottom of the page.
| Tab | What It Shows |
| :--------- | :------------------------------------------------------------------------------------------------------------------------------- |
| `Comments` | Discussion thread on the case |
| `History` | Versioned snapshots with who made each change, when, and a side-by-side diff. Click **Restore** to revert to a previous version. |
| `Results` | Manual run results that include this case, with status and the run that produced each result |
| `Issues` | Linked issues (Jira, Linear, etc.) referenced from this case |
### Print Test Case
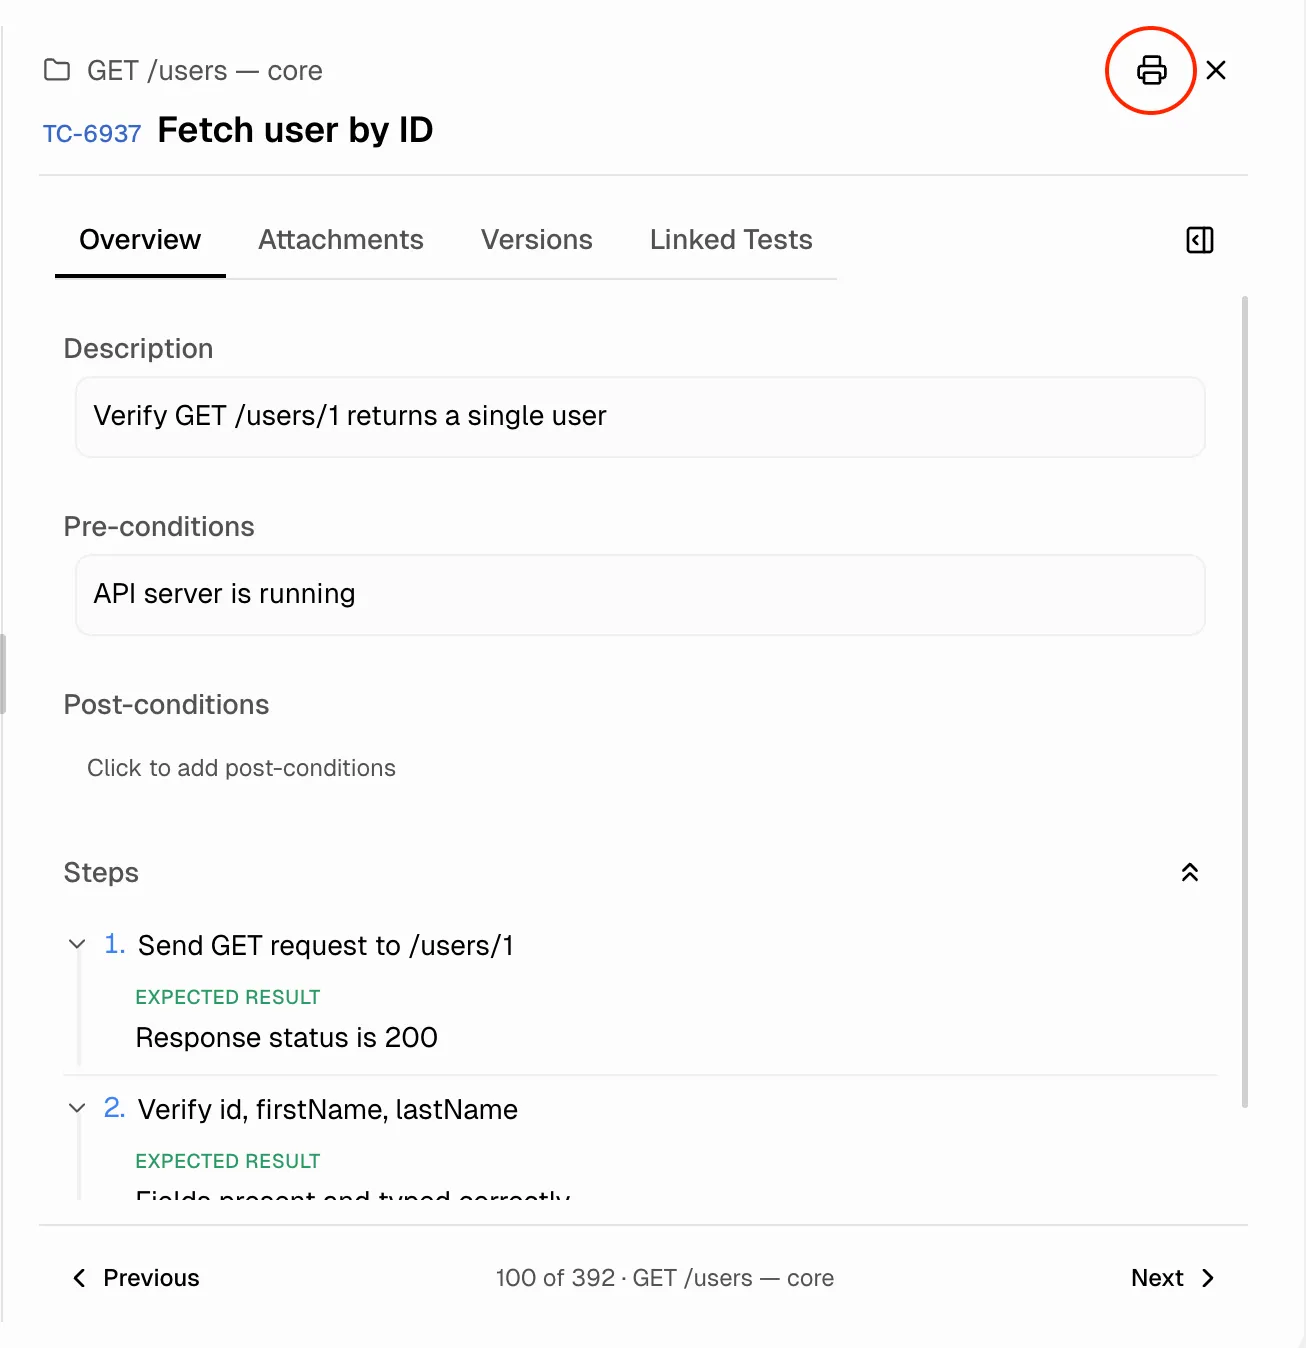
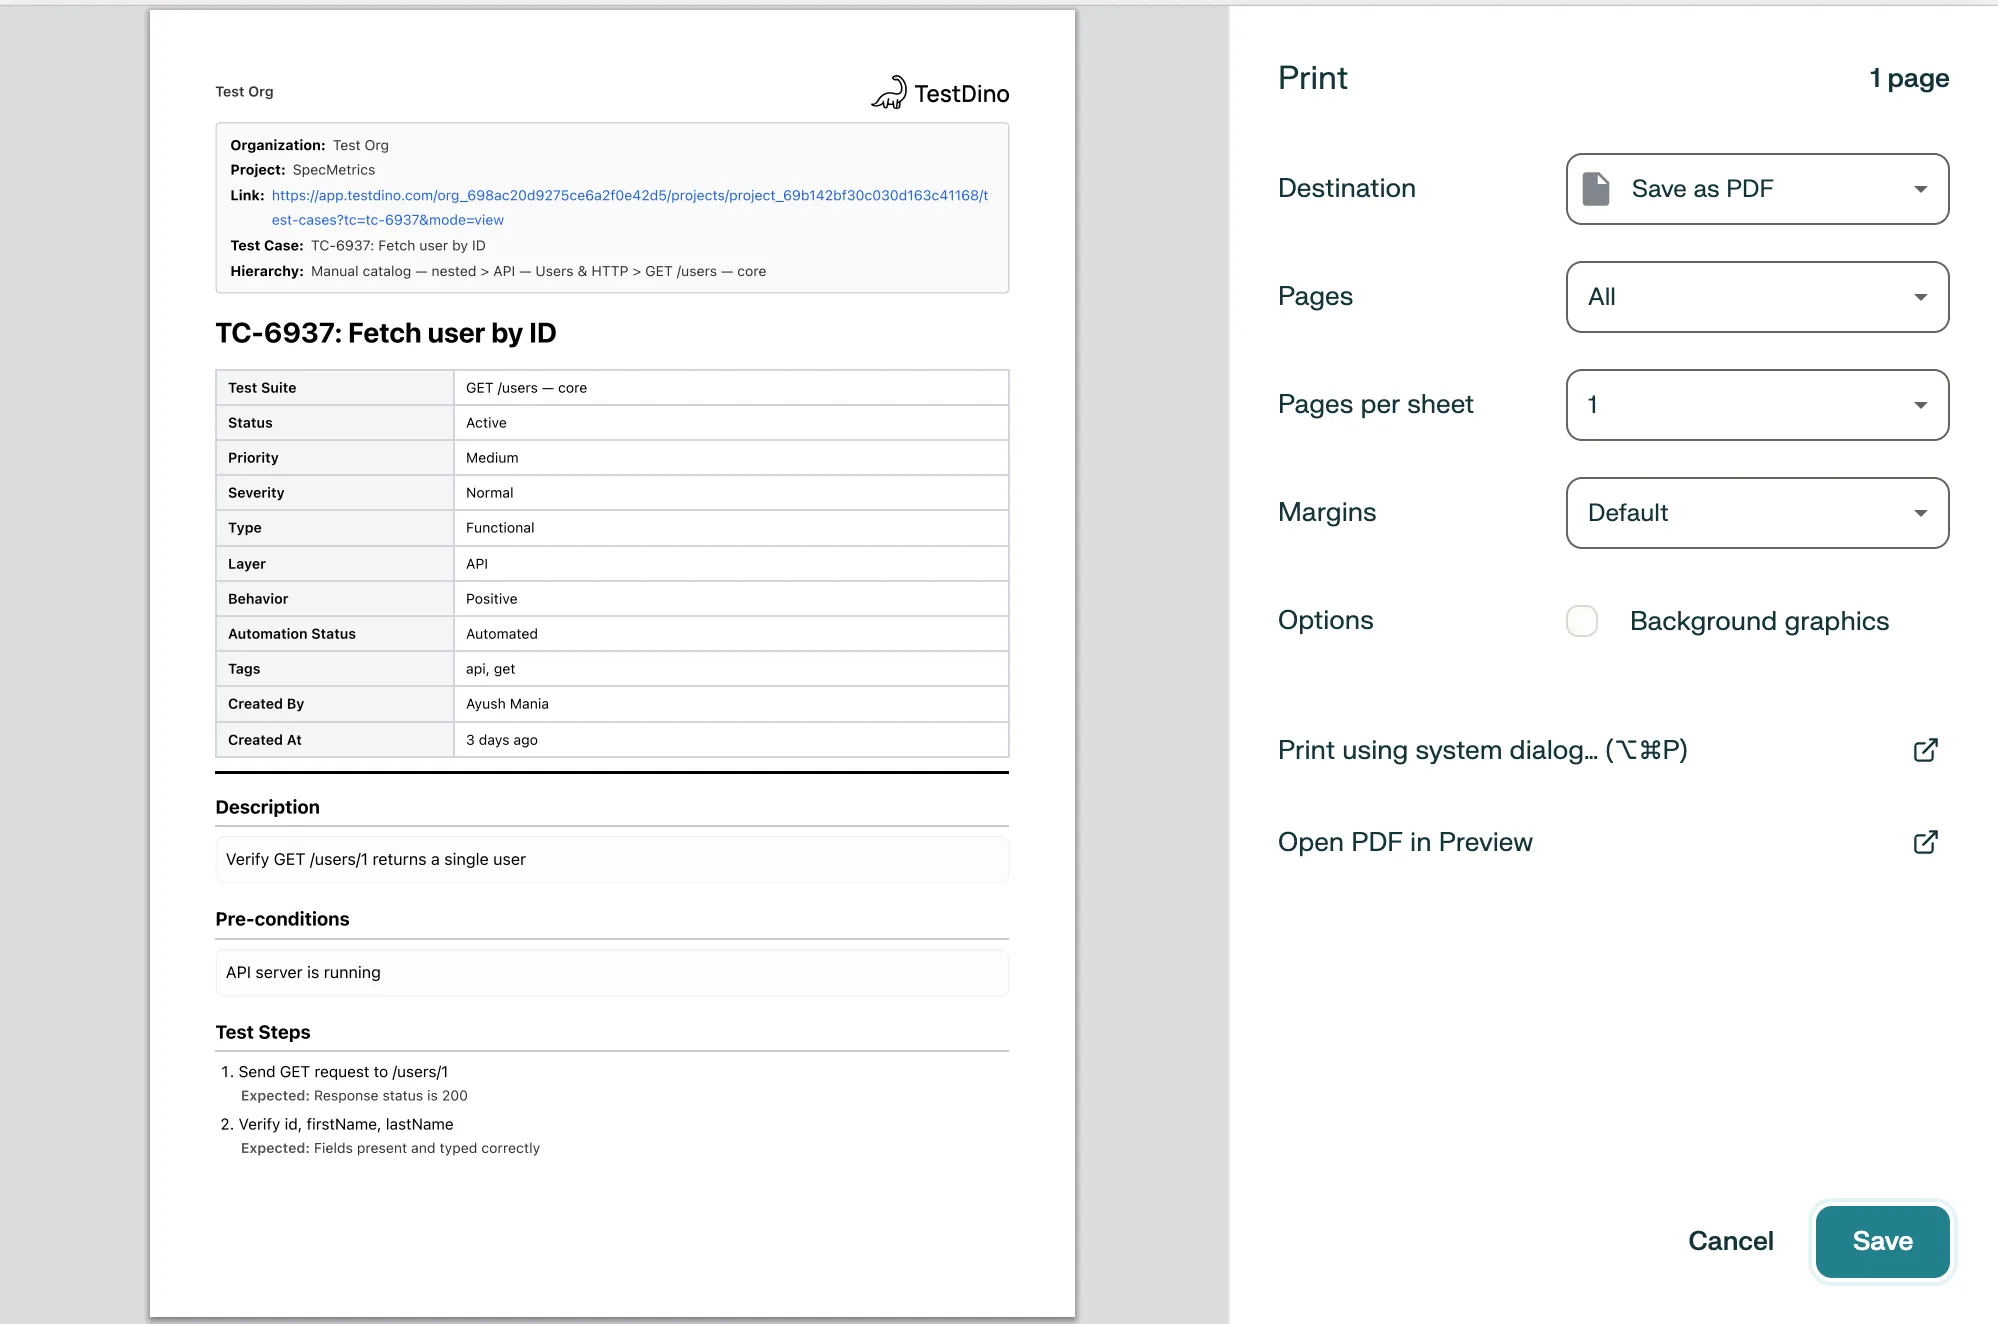
Click the print icon in the top-right corner of the Details Sheet to generate a printable PDF of the test case. The PDF includes the test case ID, title, suite, all classification fields, automation status, description, pre/post-conditions, and test steps.
### Activity
Four tabs at the bottom of the page.
| Tab | What It Shows |
| :--------- | :------------------------------------------------------------------------------------------------------------------------------- |
| `Comments` | Discussion thread on the case |
| `History` | Versioned snapshots with who made each change, when, and a side-by-side diff. Click **Restore** to revert to a previous version. |
| `Results` | Manual run results that include this case, with status and the run that produced each result |
| `Issues` | Linked issues (Jira, Linear, etc.) referenced from this case |
### Print Test Case
Click the print icon in the top-right corner of the Details Sheet to generate a printable PDF of the test case. The PDF includes the test case ID, title, suite, all classification fields, automation status, description, pre/post-conditions, and test steps.
 **Tip**
Use [Bulk Actions](/test-management/bulk-actions) to print multiple test cases at once.
Browse test cases organized by suite
Edit, delete, or print multiple test cases
Field definitions, step formats, and project settings
**Tip**
Use [Bulk Actions](/test-management/bulk-actions) to print multiple test cases at once.
Browse test cases organized by suite
Edit, delete, or print multiple test cases
Field definitions, step formats, and project settings