How Jira works with TestDino
The Jira integration is available on the TestDino Pro, Team, and Enterprise plans.
- Connect a Jira account and set a default app and project.
- From a failed or flaky test, select Raise bug to open a prefilled issue.
- Use Sync after Jira projects or fields change. Disconnect any time.
Create a Jira bug report in TestDino
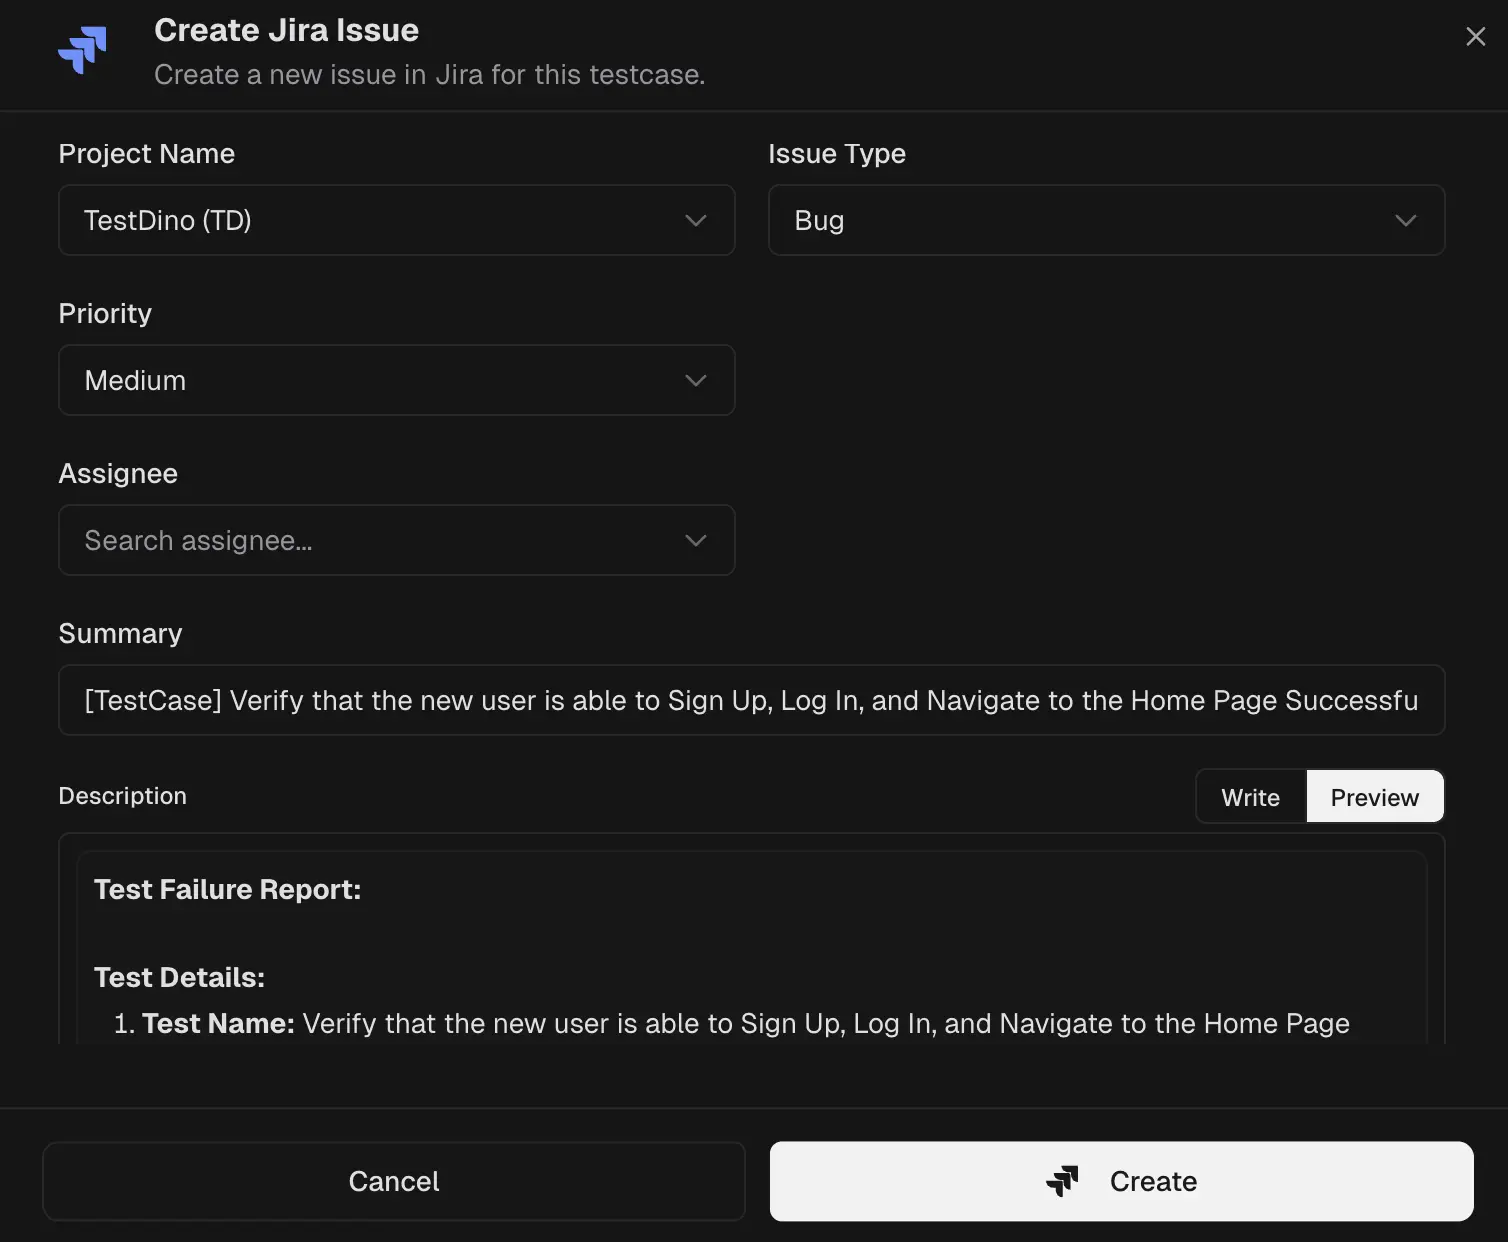
- Open a failed or flaky test and choose Raise bug.
- Review the prefilled form, edit fields if needed, and create the issue.
What TestDino pre-fills
| Section | Field | Pre-filled content |
|---|
| Jira fields | Project | Jira project for the ticket |
| Issue type | Bug, Task, or any type your Jira allows |
| Priority | Impact level for triage |
| Labels | Team or component tags |
| Assignee | Routing field for the responsible owner |
| Reporter | Routing field for the reporting user or system |
| Sprint | Planning field for the active sprint |
| Dates and points | Optional start date, due date, and estimate points |
| Summary | [TestCase] <name> - <short failure hint> |
| Description | Test details | Test name, file, branch, commit author/message, environment, run ID, execution date, duration, attempts |
| Failure information | Error type and key error message |
| Focused steps | Failing attempt with a code frame |
| Links | TestDino run, Git commit, CI job |
| Screenshots | Listed thumbnails; attach more if required |
| System note | Origin | The issue was generated from an automated test failure |
After you create the Issue
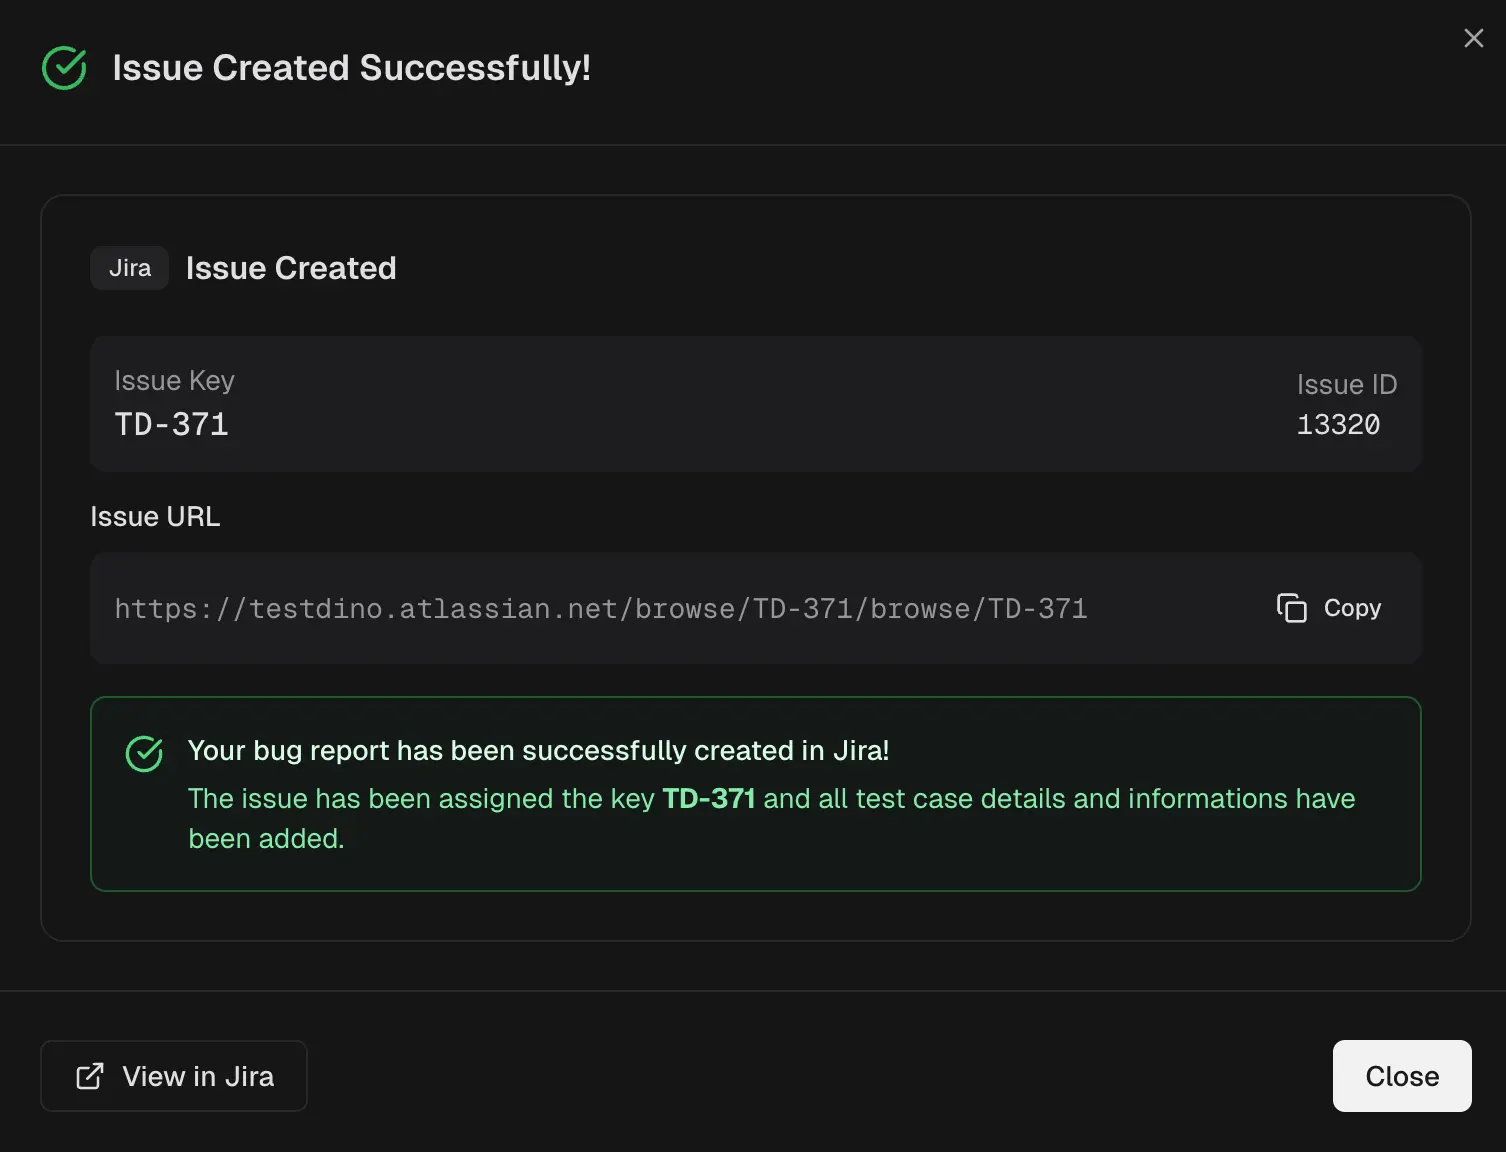
- Confirmation shows the Jira key and ID, plus a copyable URL.
- Use Sync on the Integrations page if pickers look out of date.
Why this helps
- Complete, consistent bugs in seconds.
- Developers land on proof and can reproduce faster.
Quick Links


